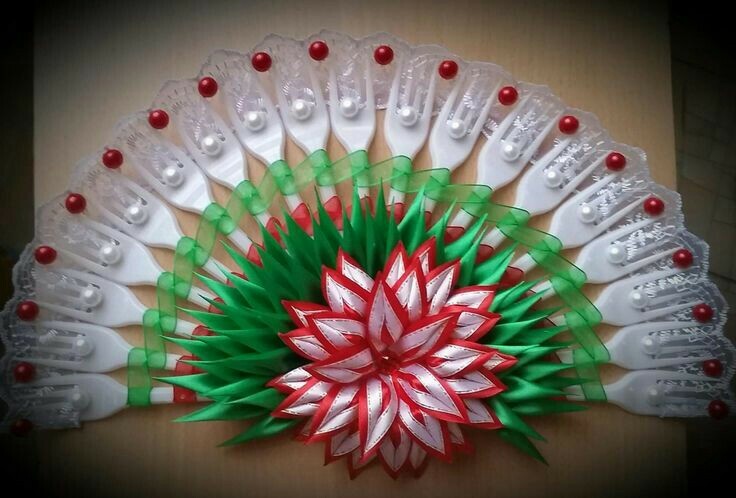
Turning plastic forks into a fan is a fascinating process that will brighten up your leisure time for both adult needlewomen and growing up ladies. At the same time, the result obtained will become a worthy decoration of any interior or a very interesting handmade gift that women will appreciate.
@ masymasmanualidades.blogspot.com
Required materials and tools
The content of the article
- Required materials and tools
- Step-by-step instruction
To make a luxurious fan, you will need plastic forks (22-24 pieces - depending on the idea). This base is complemented by:
- a cardboard circle with a diameter of about 12 cm;
- lace and ribbons from 40 cm long (for finishing the inner part of the fan) to 70 cm (for decorating the edge);
- Moment glue or glue gun;
- beads and decorative stones are optional.
Well, scissors, a measuring tape and a simple pencil will also come in handy. When all of the above is on your table, it's time to create.
@ wonderfuldiy.com
Step-by-step instruction
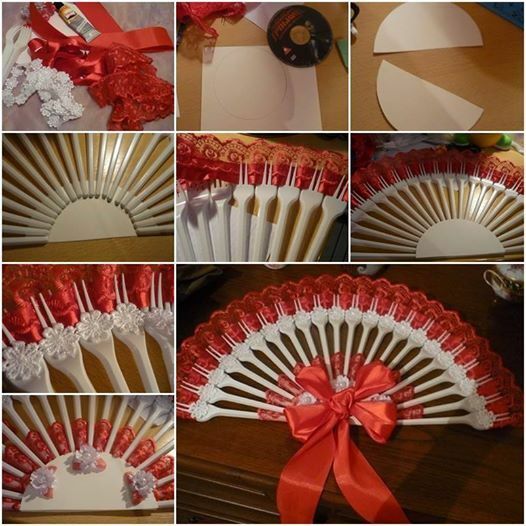
To make a fan, first cut the cardboard circle into two halves. Then, disposable forks are glued to one of them, at a distance of about 2 cm from the edge. After the glue has set, the second half of the cardboard circle is glued to the resulting base - this way we get a finished base, which will only have to be decorated.
Having picked up a suitable ribbon or lace, thread it through the prongs of each fork. In this case, the following order is recommended: 1 prong is hidden by a tape, 2 central ones remain open, the next pair (touching side horns of adjacent disposable forks) is hidden under the decor. Thus, all the teeth are woven, and if everything is done correctly, then the last of them will again be hidden by the decor. After that, it remains only to fix the edges of the tape with glue.
The next step is to weave the fork handles with ribbons. There are several techniques for accomplishing this task, but the simplest of them is threading the ribbon into the existing gaps and then fixing it with glue.
When the fan is almost finished, all that remains is to decorate the cardboard base and, if desired, glue beads or decorative stones on the bases of the forks. This is the final stage, after which you can decorate your apartment with the received product. Well, or give it to someone.
For those who find the description confused and incomprehensible, I recommend watching the following video: a detailed master class on creating a fan from disposable plastic forks.
Subscribe to our Social Networks


