Laying a warm floor in a screed takes place in several stages. The old foundation can be destroyed or saved by slightly changing the technology. First, it is important to take measurements and decide on the layout of the pipes. Selection tips, as well as step-by-step installation instructions, can be found in the presented article.
The content of the article
- Laying schemes
- Which pipes are suitable
- Laying technology
Laying schemes
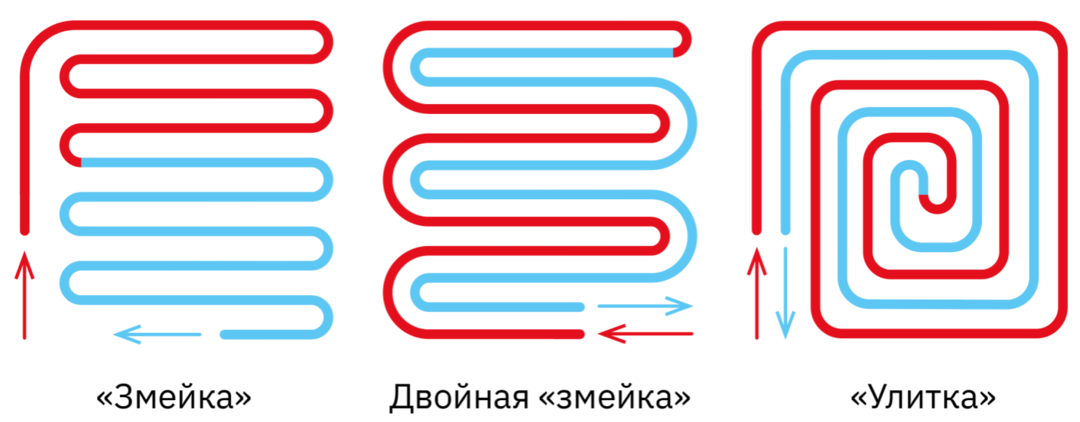
The technology of laying a water-heated floor under a screed involves the choice of a specific pipe layout. In practice, 3 options are most often used:
- "Snake" - water sequentially moves from the heater along the contour folded by the coil. As it moves, it cools down and returns to the source, where it heats up again. It is used in corner rooms for uniform heating. Moreover, laying a warm water floor in a screed is carried out from a window or the coldest wall to a warmer one.
- "Double snake" differs in that the contour is laid not with a simple, but with a complex spiral, as shown in the diagram. This is an effective way to lay a water-heated floor under a screed. Cooled water moves between the spirals of hot pipes and therefore does not lose temperature as quickly.
- Finally, there is another option, how to lay a water-heated floor under a screed - "snail". Suitable for square or round rooms, when you want to evenly distribute the heating circuit.
Which pipes are suitable
A warm floor in an existing screed will warm up the room well and serve for a long time if you choose the right pipes. Their quality, in turn, depends on the material of manufacture:
- metal-plastic serve for 20-40 years and longer. At the same time, they are cheap and easy to install. Not subject to corrosion, the inner surface is perfectly smooth and practically does not clog.
- Polyethylene - also reliable and resistant to wear, they are even cheaper than metal-plastic ones. Easy to install, but do not withstand high temperatures. However, chasing the screed under a warm floor and operating the circuit involves heating the water to only 35-45 degrees - this is safe for any material.
- Copper pipes are much more expensive than any other, but they can be called almost "eternal". Very resistant to corrosion, pollution, withstand any temperature and pressure drops. However, due to the high price, they are rarely used in practice. Usually, laying a warm floor under a screed is carried out using pipes made of cross-linked polyethylene or metal-plastic.
Laying technology
The technology of laying a warm floor under a screed involves the use of a standard set of materials and tools:
- mixture for self-leveling floor;
- soldering iron;
- set of pipes and fittings;
- thermostat;
- cable and wires;
- insulating material;
- pliers;
- knife;
- roulette;
- putty knife;
- level;
- construction vacuum cleaner;
- thermal insulation material;
- damper tape;
- a container for preparing the mixture;
- finish coating.
If you make a floor in a finished screed, you will have to partially destroy it, i.e. perform slicing. To do this, use a perforator. Since the work is noisy and dusty, you will need protective equipment (mask, respirator, goggles, headphones).
Laying a warm water floor in a screed, the scheme of which is shown above, goes through several stages:
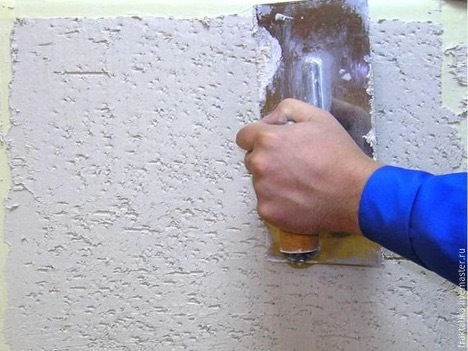
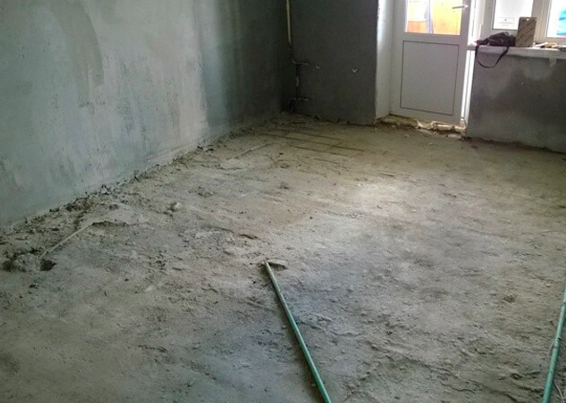
- First, irregularities in the rough screed are eliminated, dirt is removed, and sharp edges are worked out with a spatula. Carry out cleaning with a construction vacuum cleaner.
- Heat-insulating material is laid, for example, a cork substrate or ordinary polystyrene. It is attached with dowels or mounted on glue. Lay overlap and glue the edges with adhesive tape. If the floor is water, use expanded polystyrene, and if electric - penofol.
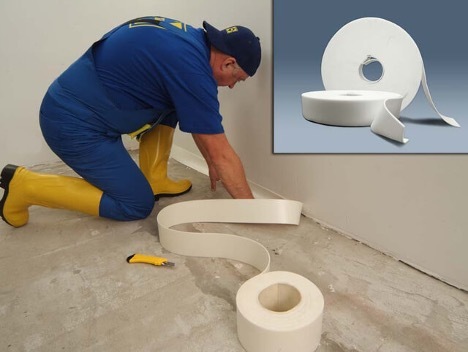
- Do not doubt whether you need a screed under a warm floor. The heating circuit must be located exactly in the thickness of the concrete. In order for the installation to proceed correctly, a damper tape is glued at the convergence of the walls and the floor.
- Now you need to decide on the scheme, i.e. how to lay a warm floor in a screed, for example, a snake or a snail. Make markup, determine the interval. The pipes must be spaced at least 10 cm but maximum 30 cm. At the same time, the bends should be smooth so that there are no sharp turns. Profiles and dowels are used as fasteners.
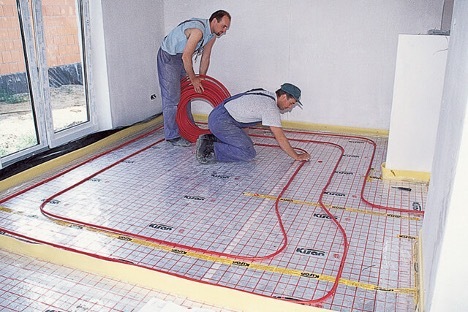
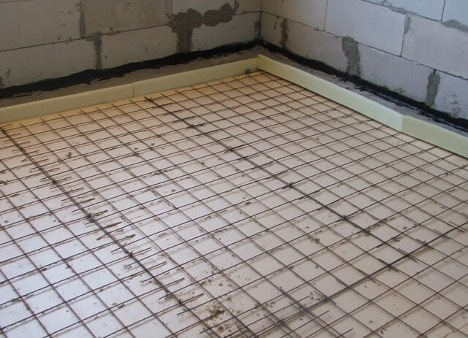
- Next, a metal mesh is laid. If you plan to simplify the installation of warm water floors in a concrete screed, you can mount it directly under the pipes so as not to hammer the base. On the other hand, you can put it directly into the finishing screed or use both options at once.
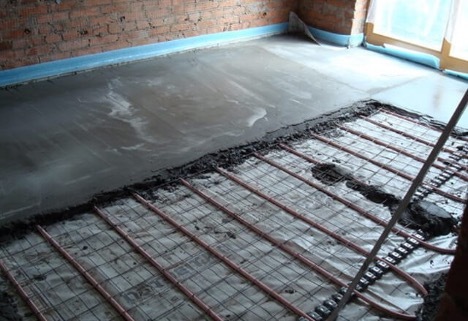
- Prepare the mixture and start pouring concrete. But first, water is supplied to the pipes and the tightness is checked, as well as the heating efficiency. The pipes should heat up evenly, but not too much.
- Beacons are placed from a profile or timber at a distance of 50 cm from the wall surface. The concrete mixture is poured from the corner farthest from the door and then moved to the center, to the opposite wall. During pouring, the mixture is pierced with rods to prevent the formation of air cavities.
When the installation is over, it is necessary to let the concrete dry for 3-4 weeks. During this time, it can not be wetted, and even more so turn on the warm floor. Otherwise, the canvas will not harden, but dry, which will adversely affect its qualities. Only after a month you can turn on the heating circuit and use it.