The floating floor is a multi-layer structure that does not come into contact with the subfloor and walls. It is laid on soundproofing, which provides a shock-absorbing effect and the possibility of using it in different houses, including those with shrinkage. The advantages and disadvantages, types of such technology are described in detail below.
The content of the article
- The device and purpose of the floating floor
- Construction types
- Design pros and cons
-
Step by step installation instructions
- prefabricated floor
- Dry screed
The device and purpose of the floating floor
It can be said about the floating field that it is a floor structure consisting of several layers and not having direct contact with the base of the floor, as well as with the walls. In fact, this is a screed that “floats” on the surface, because it is not laid on it, but through a soundproof layer. Those. it does not "hang in the air", but is mounted on a different base.
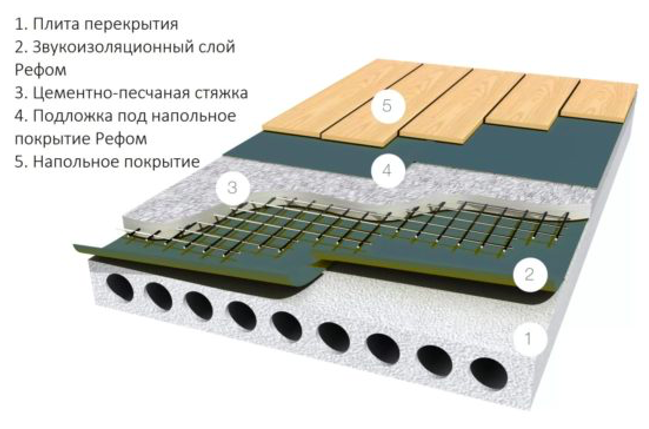
The floating floor screed consists of several layers:
- Soundproofing is laid on the floor slab.
- Next comes waterproofing.
- Then the actual reinforced screed.
- Sealant is placed on top of it.
- The last layer is a finish, such as laminate.

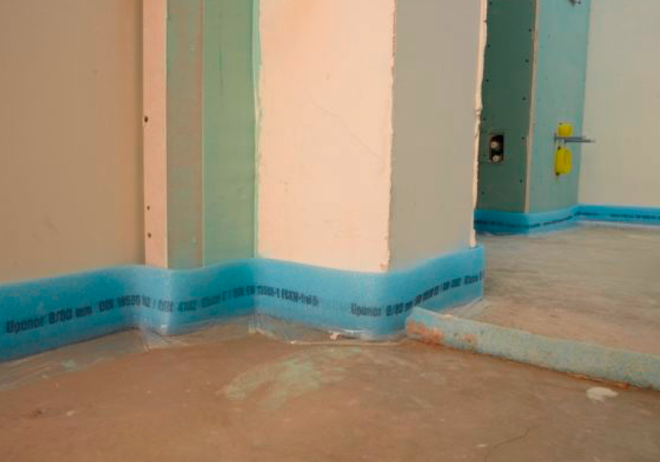
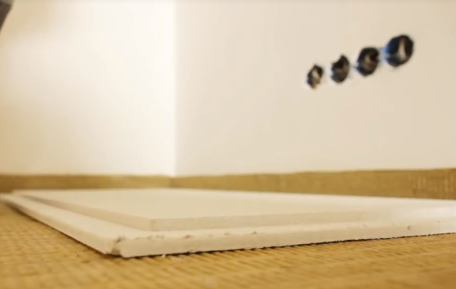
Thus, the "floating" effect is achieved due to independence from the base and the structure of the walls, i.e. both horizontally and vertically. This is possible due to the compensation gap along the perimeter between the surface of the wall and the screed. You can provide an interval using a damper tape, the thickness of which is selected in advance. It is fixed along each ledge, as shown in the photo.
A floating floor, the design and device of which is described above, unlike the usual one, can be used in several cases:
- In rooms of any type, where it is necessary to provide high-quality sound insulation from below.
- If there is a need for good thermal insulation (on the first floors, in regions with frosty winters).
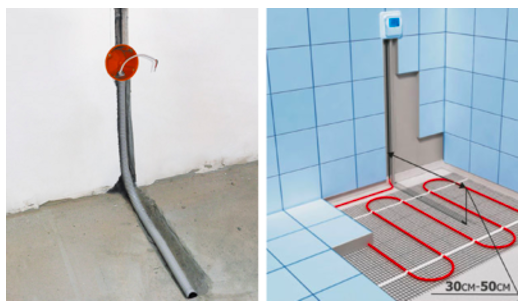
- It is planned to create a heating circuit for underfloor heating (heating expands the material, which is compensated by the gap between the screed and the walls).
- If the building is undergoing a shrinkage process - new buildings or wooden houses.
Construction types
The technology of floating floor screed is different. Depending on the characteristics of the main surface, 4 types are distinguished:
- on a wooden surface
- on the basis of a dry screed;
- prefabricated floor;
- concrete screed.
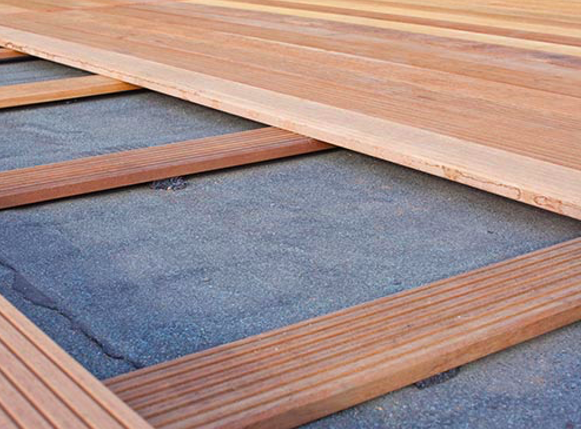
Laying on a wooden surface involves the creation of a wooden frame. In fact, this is a draft floor that you can quickly do with your own hands. First put the supports and then put the boards.
If we talk about what a floating floor is on a dry screed, we should mention the features of such a design. In this case, between the sound insulation and the heat-insulating material, overlaps are installed - logs. In the space between them, a dry mixture based on sand or other raw materials is poured.
Unlike wet or semi-dry technology, no water is used in this case. Therefore, the installation process is faster - you can immediately start finishing without waiting for the layer to dry. There are other benefits too:
- light weight;
- "clean" work without dirt;
- affordable cost;
- the possibility of laying any communications;
- excellent thermal insulation.
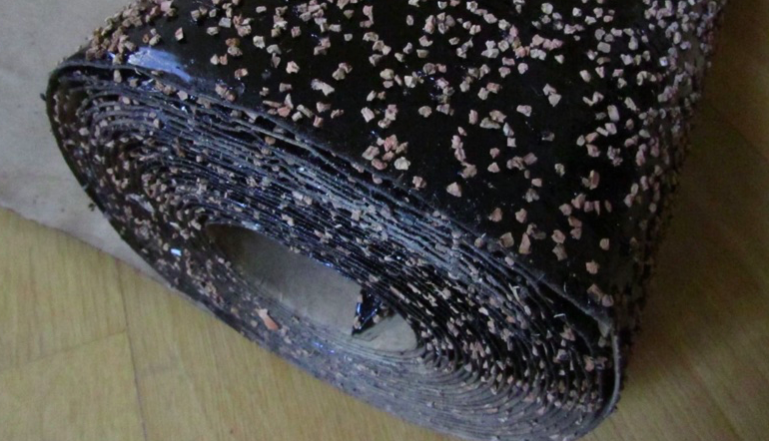
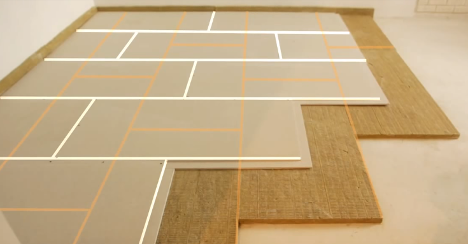
We can say about the floating field that it is such a multi-layered structure that fits on a layer of sound insulation. The design can also be prefabricated - in this case, several types of coating are used:
- high strength MDF;
- grooved board;
- parquet;
- roll materials.
During installation, soundproofing is first laid, then slab material, dry screed. Mount sheets and fix with screws.
There is also a "floating floor" system on a concrete screed. In this case, the cake has a typical structure. A cement-sand screed is laid on the soundproofing, then there is a lining and flooring.
Design pros and cons
A floating floor design has several advantages:
- good sound insulation;
- good thermal insulation;
- relatively simple installation;
- affordable price;
- independence from the floor surface - a universal option;
- cushioning effect;
- possibility of application even in conditions of shrinkage of the building;
- easy maintenance and maintainability.
Step by step installation instructions
The floating floor in the apartment is most often done using prefabricated technology or using a dry screed. The relevant instructions are detailed below.
prefabricated floor
For the construction of a prefabricated structure, proceed as follows:
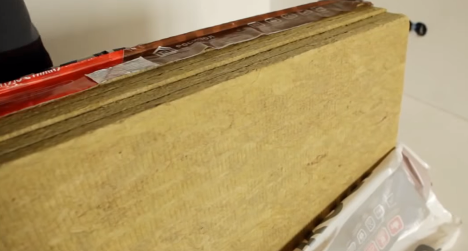
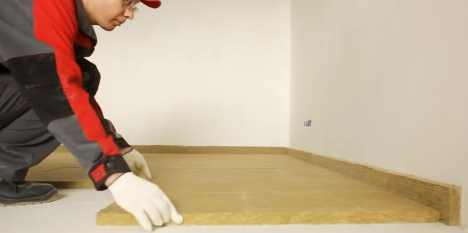
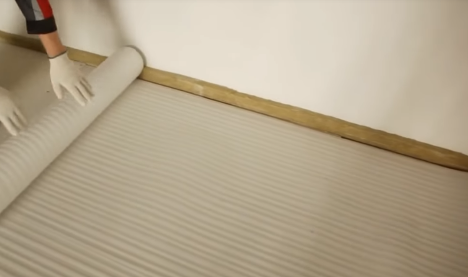
- Lay a layer of rigid slabs - soundproofing. Usually it is made of mineral wool, and its thickness should be an average of 30 mm.
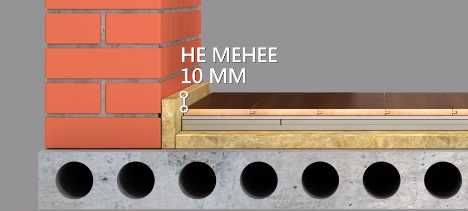
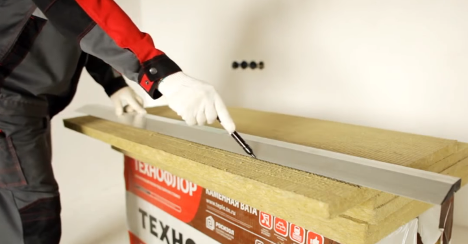
- If you make a wooden floor on the logs in the apartment, you need to build a frame from the rails and the log itself. But in this case, the technology is different - mineral wool slabs are placed on a rough base, then other slabs are taken and cut into strips. Moreover, their width should be within the floor height parameter by at least 10 mm, as shown in the diagram.
- Cut on a flat surface using a sharp knife or hacksaw.

- When making a floating floor on logs, you must first lay the slats. But in this case, it is enough just to install stripes along the walls.
- Next, soundproofing is laid in one layer.
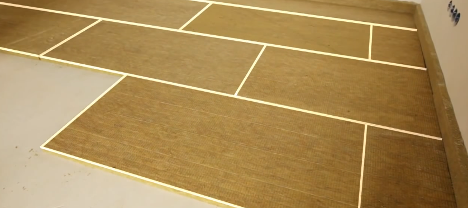
- The device of the floating floor involves taking into account the expansion of the seams, which must be the same for even distribution of the load.
- Then they put a dry screed - in this case, it can be sheets of thick plywood, chipboard, etc. During installation, you can walk on the sound insulation layer without restrictions - the material is durable and withstands strong loads.
- The joints are coated with ordinary PVA glue to prevent gaps.
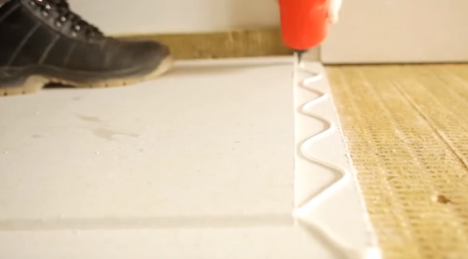
- Next, screws are screwed in at the same distance (maximum interval 30 cm).
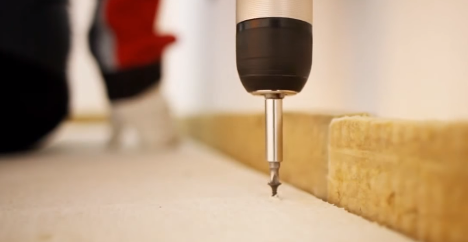
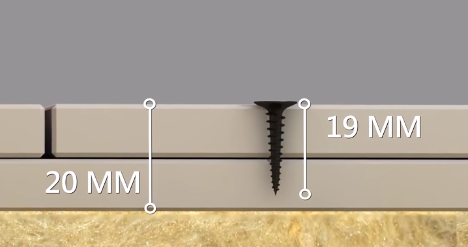
- In this case, the length of the screws must be less than the total height of the tie, as shown in the diagram.
- Next, lay the next row, providing for a gap of at least 15 cm.
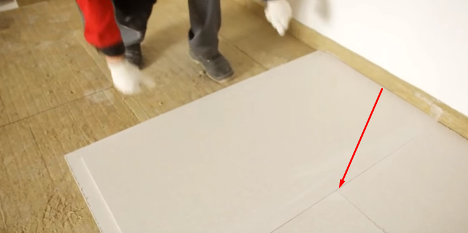
- Since the floating floor is a solid structure, it is necessary to ensure that the joints of the sound insulation and the actual screeds are in different places, i.e. did not go over each other.
- Make the laying of the substrate.
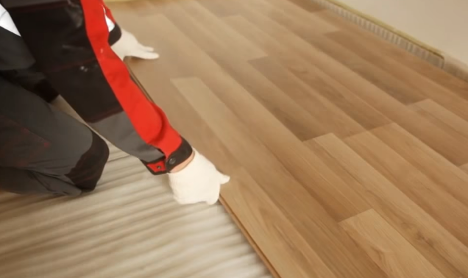
- And the last stage is the finishing coat (you can choose any option).
Dry screed
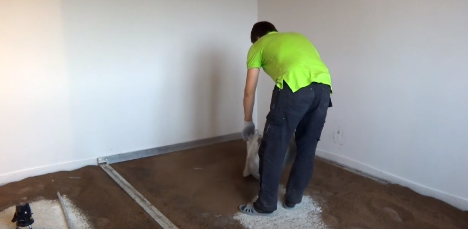
A floating self-leveling floor can also be laid using dry screed technology. The sequence of actions is as follows:
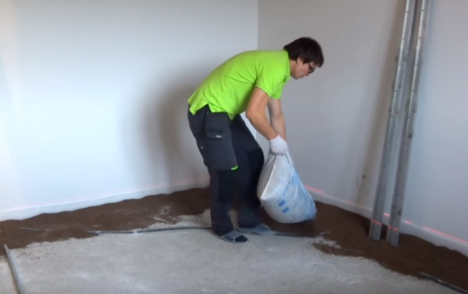
- First, the surface is thoroughly cleaned and an edge tape is applied to the walls. To fix, sprinkle with a mixture of insulation or other material.
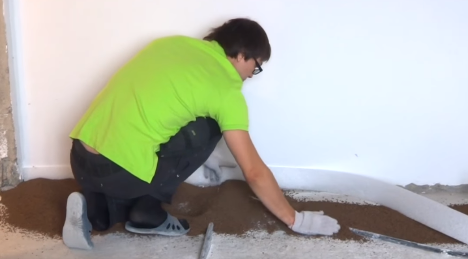
- Level the floor with a dry mixture, the fraction should be small - within 4 mm.
- Using an accurate laser level, put the guides.
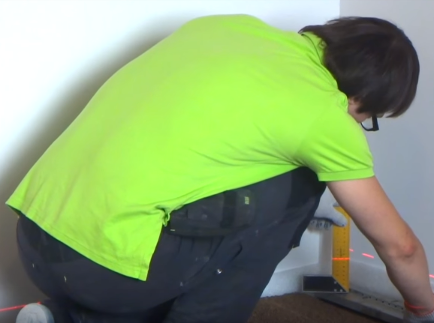
- To make them stand evenly, backfill is used.
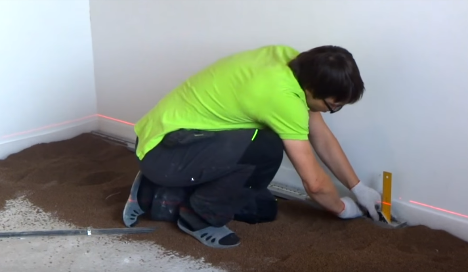
- Putting the second guide, pay attention to the length of the rule, which should walk freely on the surface.
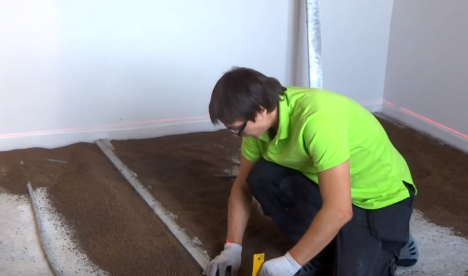
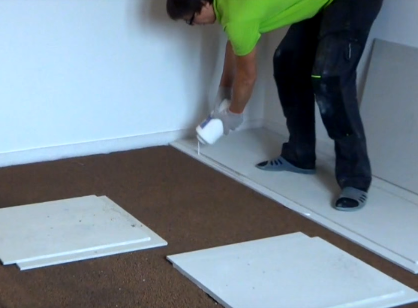
- Fill the backfill in the gap between the two guides.
- Tiled material is laid, PVA glue is applied along the edges.
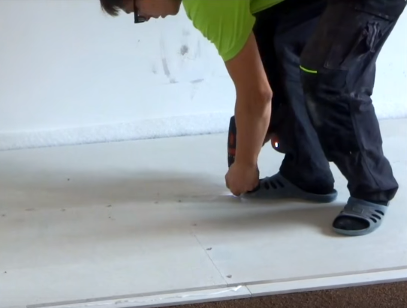
- Fasten the elements with self-tapping screws.
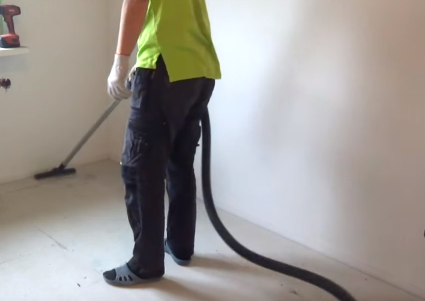
- Clean the subfloor and start finishing.
As can be seen from the review, it is not so difficult to mount a floating floor, especially if you use prefabricated technology or fill in a dry screed. In a small room, all work can be done in a few hours without the use of special equipment.