The preparation of walls for liquid wallpaper begins with the removal of the previous base, processing with putty and primer. Moreover, it is better to prepare the mixture in advance, because it matures within a few days. Instructions for processing and mixing the composition can be found in the presented article.
The content of the article
- Do you need putty
- Wall preparation procedure
- Preparation of liquid wallpaper
Do you need putty
Liquid wallpaper is a decorative plaster based on organic and mineral components (lime, cellulose, acrylic, silicate and others). This composition can be applied to almost any surface.
But unlike ordinary plaster, decorative plaster is not intended for leveling walls. It should only be applied to a well-prepared surface. The procedure for preparing walls for liquid wallpaper involves several steps:
- Removing the old base.
- Dismantling of hard parts, nails.
- Wall alignment.
- Putty application.
- Padding.
If you figure out how to prepare the walls for liquid wallpaper, you can take advantage of all the benefits of this type of finish. They are easy to apply, do not crack even after the house shrinks, do not crumble, and most importantly, they look very nice. There are no shortcomings as such, but it is important to correctly align the walls - otherwise it will not be possible to achieve a high-quality result.
Wall preparation procedure
Preparation includes several stages. As a rule, work begins after the preliminary removal of the old layer and thorough cleaning. But sometimes you can apply liquid wallpaper to the paint. This method is acceptable if the surface is complete, does not exfoliate and at the same time matches in color. You need to understand that decorative wallpaper is applied in a thin layer and will not be able to completely cover the old background.
Preparing walls for applying liquid wallpaper looks like this:
- Remove old paint and plaster. Carefully remove the remnants of the old material - this stage is very important, so it is better to try to prepare the surface well.
- Remove protruding nails and other hard elements.
- If some communications, for example, pipes cannot be removed, putty is put on top with a layer of 2 mm. Another option on how to prepare liquid wallpaper for work is to cover it with oil paint.
- Align the walls, eliminate the recesses with gypsum-based putty. If there are plasterboard partitions, they are also treated with putty. Moreover, the composition is placed not only on the surfaces themselves, but also on the joints between the plates.
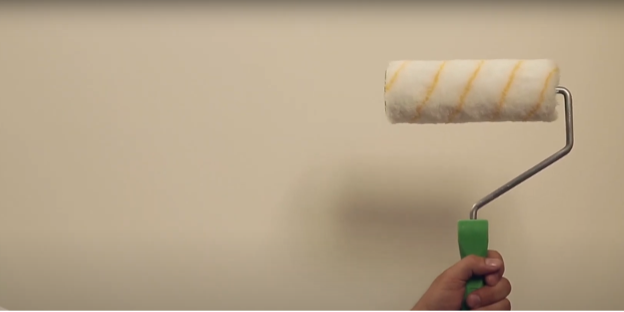
- When the surface is already prepared and leveled, the preparation of walls for liquid wallpaper is simplified. Now it remains to treat them with a primer. It is better to buy the usual composition of deep action. Apply it in several layers, allowing the previous one to dry for 3-4 hours.
- Then, when the last layer of the primer dries, they go through the putty again. But for this they use not a standard, but a special putty specifically for liquid wallpaper. This is a special composition of a thick consistency that well levels the wall for further processing. If it is not available, you can use ordinary white water-based paint. Another option is to cover with facade paint.
Preparation of liquid wallpaper
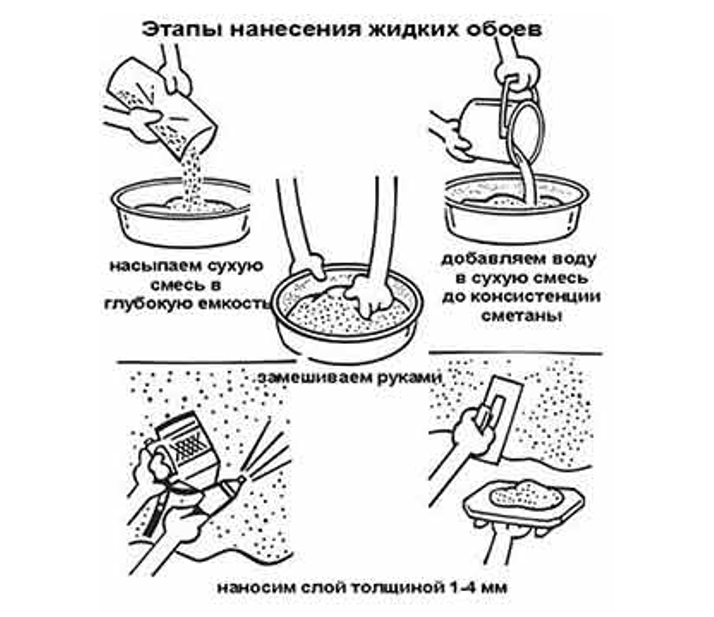
Need preparation and liquid wallpaper. Moreover, the composition matures for a rather long time - about 10-12 hours. Therefore, it is better to start in advance, even during the processing of the walls with a primer. The technology of preparation depends on the characteristics of packaging. In some cases, all components are packed in different bags - then they are poured into the water in turn. Often they sell ready-made formulations, which are enough to be diluted with water according to the instructions:
- Warm, but not hot water is poured into the container in the volume indicated in the description.
- A mixture is introduced into it, diluting each package separately, or adding the entire composition at once.
- Stir the mixture yourself, i.e. manually, without the use of special equipment. This is the easiest way to achieve uniformity when working with relatively small volumes. Although if the manufacturer allows the use of a drill with a mixer attachment and indicates this in the instructions, this method can also be used.
- Preparing the walls before applying liquid wallpaper necessarily involves the maturation of the mixture for several hours - it is better to let it stand up to 12. It is important to focus on the recommendations of the instructions. Due to swelling, the adhesive becomes soft and securely binds the base.
- When everything is ready, you can mix again. At this point, the preparation of concrete walls for liquid wallpaper will already be completed. It is better to immediately start applying the composition, because standing for too long is also undesirable.
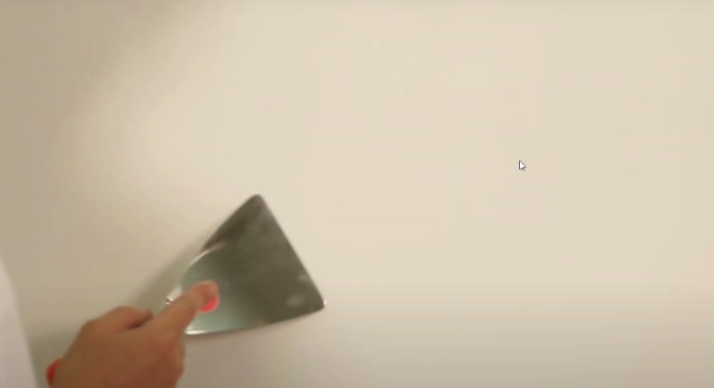
From this review it is clear whether it is necessary to putty the walls under liquid wallpaper. This is a very important step, without which it will not work. Moreover, the composition itself should also be prepared in advance. Then it is applied to the wall with a spatula and evenly distributed. Thanks to this, the walls for liquid wallpaper will turn out beautiful and almost perfectly even.