Portable heater - devices for short-term heating of objects in the room. They are in demand among tourists, fishermen, hunters, garage craftsmen and ordinary people. Often, when hiking / fishing, you have to spend a lot of time in the same place or in a tent without heating. Conditions are not always favorable. Save the heaters. Large models are used for heating small rooms - usually tents. But it is not always advantageous to use such models. When fishing in cold weather, hands often freeze, and it is unreasonable to turn on a huge heater on the street to warm your hands. For this, there are portable mini-heaters.
What are the main advantages of mini-heaters? They are easy to install, heat up quickly, use little fuel, are safer than larger units, are convenient, portable, and small in size.
Do you want to make a portable heater? Then first get acquainted with their types. After that, we will look at how to make a simple mini hand warmer, its principle of operation, and also tell you how to make a simple heater from several candles.
The content of the article
- Types of portable heaters
- How to make an electric mini heater. The principle of operation of the electric mini-heater
- Budget heater from candles and flower pots
Types of portable heaters
Heaters are distinguished by the fuel used, there are:
- petrol,
- alcohol,
- gas,
- electric heaters.
Further, they are classified according to other criteria - the method of fuel combustion, heat transfer, and so on.
Alcoholic appliances are the cheapest. They are easily produced, they can be obtained everywhere, as well as fuel for them. But their disadvantages are low efficiency and power, and at low temperatures (6 degrees) they will not start.
Petrol heaters are very popular in the CIS countries. This is a holdover from the USSR when they were at their peak. There are different models: open type, where users heat themselves directly from the flame, you can also cook on these; closed type, where heat is transferred through the coolant, and others. The main advantages of gasoline models: availability, low price and inexpensive fuel. Of the minuses: an unpleasant smell, smoke, the risk of ignition / explosion.
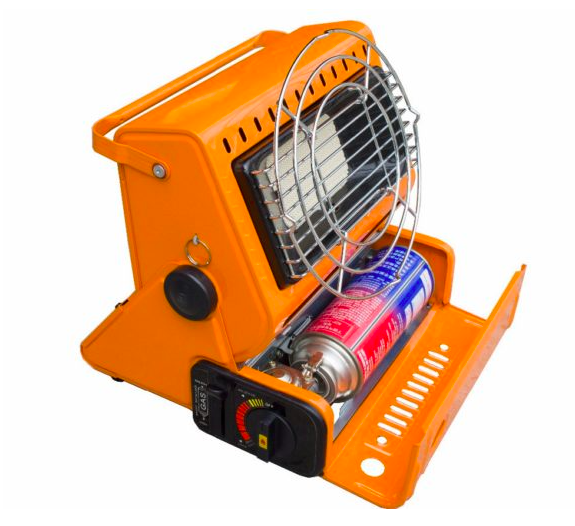
Gas devices, like gasoline ones, come in several types, including closed and open types. On the open type you can cook. Closed ones are often equipped with a reflector that purposefully heats a certain area. Advantages of gas heaters: cheap fuel, no smoke, availability, ease of use. Cons: explosiveness, low economy and efficiency.
Electrical models are probably the most comfortable. They and other equipment can be connected to the same source. Among electric heaters, infrared heaters are considered the best. Their peculiarity is that heat is transferred from them to objects, and not to air, which significantly increases their efficiency. Advantages of electric heaters: efficiency, availability, price, cheap "fuel". Disadvantages: low efficiency.
How to make an electric mini heater. The principle of operation of the electric mini-heater
First you need to choose the material from which you will make the heater. It is better to use refractory plastic or metal. The tree will not work - the heating element will set it on fire. In the case of plastic, the base design can be made on a 3D printer or cut and glued by yourself. The metal base can only be made by hand.
You can also use a pre-made form. For example, an old incandescent lamp or a watering can.
The shape of the heater will be in the form of a pyramid-watering can. The base is a square for the cooler, the top is a rectangle for the heating element.
For manufacturing you will need:
- Pencil, marker, ruler
- Cooler for power supply
- soldering iron
- wires
- power unit
- 12 Volt power cable
- Heating element (can be ordered from Aliexpress, the price is about $ 3)
- Finished mold/high-melting plastic, scissors, glue gun/thin sheet metal, metal shears
The first step is to make a drawing based on your details. A cooler is taken as a basis - a square of 12 by 12 cm, a cut pyramid is built from it. At the top of the cut pyramid is a heating element. In our case, a rectangle 5 by 2 cm.
Skip the next step if you have a mold ready or you are 3D printing it. If you are making a heater out of plastic / metal, then cut out all the elements - eight plates (half of them are 12.3 by 2.3 cm, the second half along width and height of the heating element + 0.3 cm), four trapeziums (depending on the size of your heating element) and a grate (also according to the dimensions element).
3 millimeters is added to the elements for additional space - flaws, hot melt glue points, metal solderings.
Next, start assembling the base. First, make a "winding" for the heating element. Check how he sits. Solder/glue the parts. Install the grate. The second step is to make a winding for the cooler. Also connect the cut out elements. Make sure the cooler is seated. Glue the cooler to the winding. At the end, start making a cut pyramid. In one of the faces, make a hole for the wires.
Next, solder the two wires to the wires from the cooler. Connect the wires from the cooler to the heating element. Pass the outgoing wires through the hole in the pyramid. It is recommended to seal this hole with something. Connect all three elements.
Connect the wires from the heater to the 12 volt cable. Connect the cable itself to the power supply.
If desired, you can make a base and a tripod for the heater.
How this heater works:
The power supply supplies electricity through wires to the cooler and heating element. The element heats up, the cooler blows it with cold air from the room. Hot air is blown out of the structure.
If you want to modernize / improve your design - use a more powerful element and install a radial fan.
Budget heater from candles and flower pots
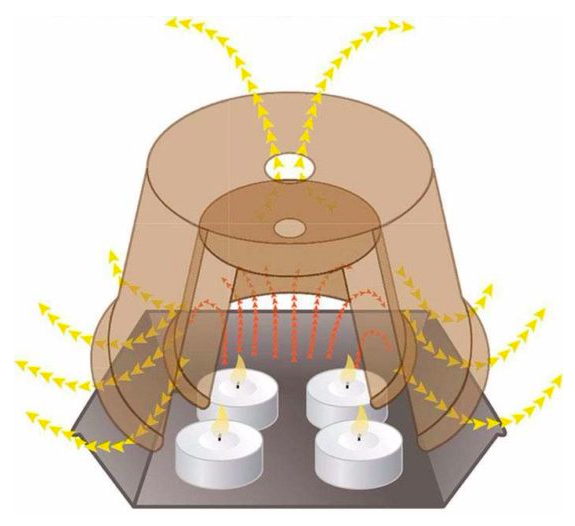
There is also a very simple version of the heater. It is made from several candles, two pots of different sizes for flowers and ceramic / metal utensils. Set fire to the candles and put them on the dishes, cover them with a pot (there should be a hole for drainage in its bottom), cover with another, large, pot on top. All. The heater is ready.
Candles burn, heat the air. Warm air rises, passes through the openings of the pots and reaches the user. By the movement of warm air, it resembles a mini-fountain.
The effectiveness of such a device is very low, but it will save you in an emergency or when you have nothing to do.