The roof insulation scheme involves the installation of a heat-insulating material, its hydro- and vapor barrier, as well as the installation of a wooden counter-lattice to make the structure stable. A detailed description of the structure of the roofing pie, as well as step-by-step instructions for warming, are presented in this article.
The content of the article
- roofing cake
- External insulation
- Internal insulation
roofing cake
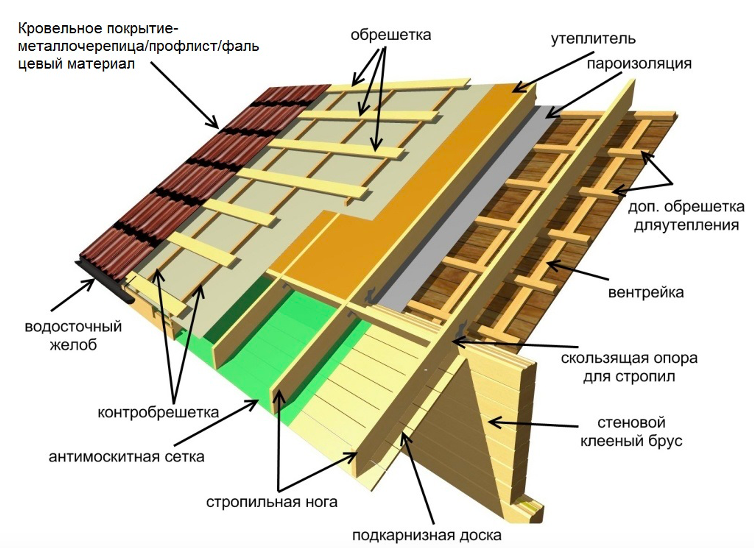
The device of an insulated roof differs significantly from a cold one by the presence of 9-10, and sometimes more layers. And this is not only the insulation itself, but also vapor barrier, crate and other structural elements. If we consider them from outside to inside, the sequence will be as follows:
- Roofing is the outer layer that protects the roof from external influences - precipitation, wind, cold. Often, modern materials are used for this, for example, metal or soft tiles.
- Lathing - a wooden frame that serves as the main fastening of the roof and ensures uniform distribution of the load.
- Roof insulation is a material for protection against condensation. It can be a dense polyethylene or other film.
- The counter-lattice is an indispensable element of the cake, which is needed to create a small gap. This is the ventilation space that is needed for ventilation and creating a normal microclimate in the attic.
- Roof insulation, materials for it are of great importance, but load-bearing supports play an equally important role. This is a truss system, which is often made of beamed wooden or metal elements. They not only withstand the entire weight, but also the load associated with gusts of wind.
- Next comes the thermal insulation, that is, a layer of insulation. It can be mineral wool, foam plastic, polyurethane foam and other materials.
- There must also be a vapor barrier, i.e. membrane, a film that protects the insulation from the inside from condensate resulting from the temperature difference in the attic and on the street.
- Next comes the rough crate - this is a frame made of wooden boards that keeps the insulation in a level position.
- The roof insulation device ends with a finishing layer. It can be rough for future finishing or finishing, without additional work. Sometimes finishing is not required if the room is not planned to be used as an attic.
External insulation
The roof insulation device is usually started from the outside, since this is quite enough for a moderately cold winter. But if the climate in the region is harsh or if it is planned to use the attic as a living space, it is the internal insulation that is necessarily done, which is described in the next section.
As for the outside, for these works you will need tools and materials such as:
- screwdriver;
- knife with a sharp blade;
- building pencil;
- self-tapping screws;
- waterproofing;
- vapor barrier;
- roofing material;
- insulation.
To make a pitched roof cake, proceed as follows:
- Dense bitumen membranes or other material for vapor barrier are placed around the entire perimeter. Films are not recommended, because they are not so strong and do not hide irregularities well. The material is glued onto a concrete screed, and the ends are led behind the ceiling and the seams are soldered.
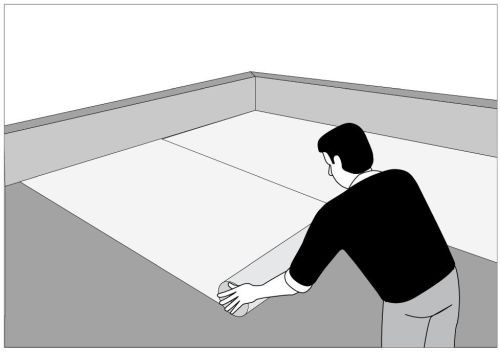
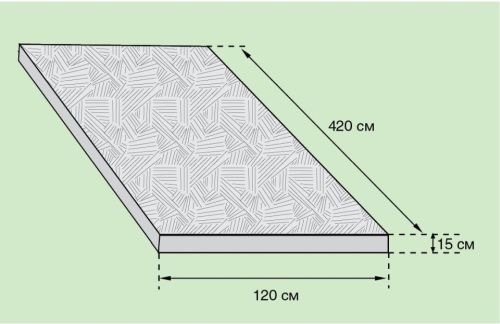
- Next, insulation for a warm roof is laid. For this, insulating mats of standard sizes are used, for example, 150 mm thick, 4200 mm long and 1200 mm wide. They are laid end-to-end, trying to make it as tight as possible.
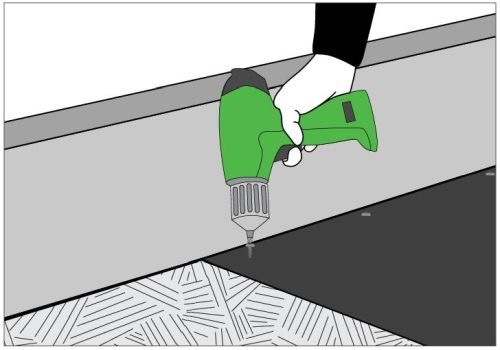
- The next step in the instructions on how to make a warm roof is to lay the rolled waterproofing with an overlap of 10-15 cm and secure it with self-tapping screws.
- Finally, at the last stage, a metal tile or other roofing material is laid.
Internal insulation
Insulating the roof of a house from the outside gives only a relative effect. If reliable protection is required, work is carried out from the inside. The procedure is as follows:
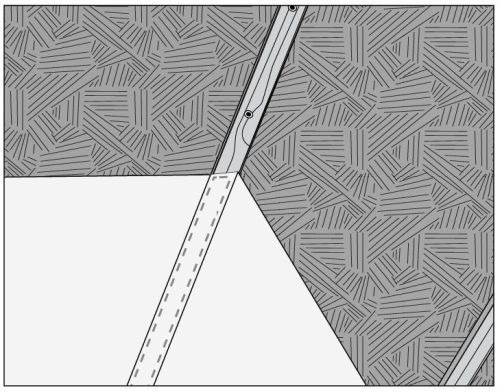
- The first inner layer is waterproofing, which is fixed with staples using a construction stapler.
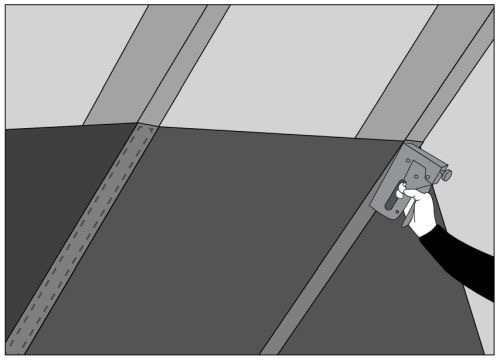
- Next, they mount and fix the counter-lattice with the help of a bar and self-tapping screws.
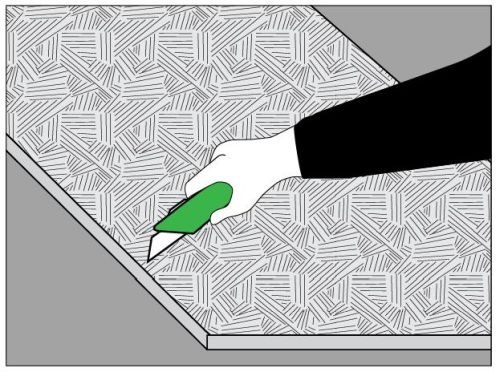
- The correct arrangement of the roof involves the installation of thermal insulation. If the material is produced in the form of mats, they are first removed and allowed to lie flat for several minutes.

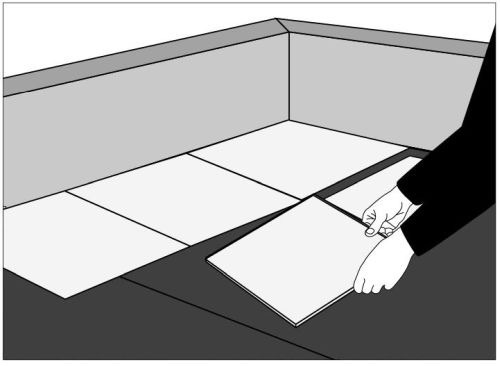
- Mats are cut out, having previously measured the interval between the rafters.
- Insert the material by surprise, as shown in the figure.
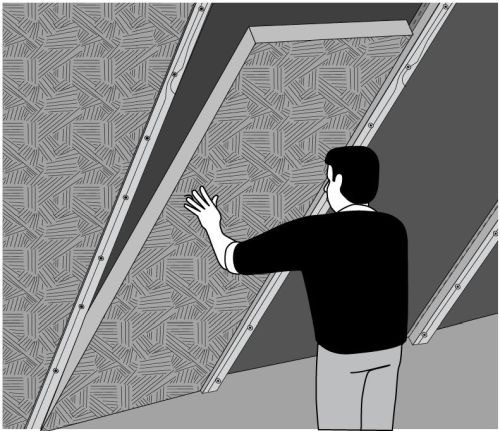
- Next, a vapor barrier is installed - the membrane is also fixed with brackets.
- To make the joints airtight, the edges of the canvas are glued with construction tape. The design of the insulated roof involves the insulation of all joints, including at the junction with a window, pipe and other structural elements.
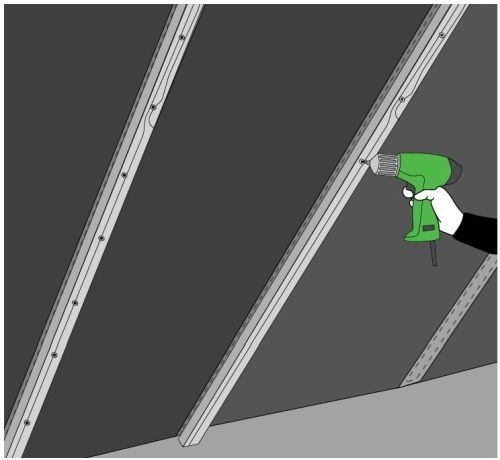
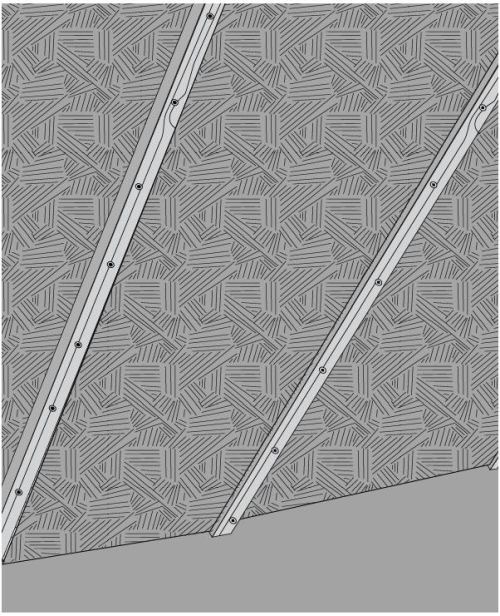
- A counter-lattice of wooden boards is placed on the vapor barrier. They are also fixed with screws.
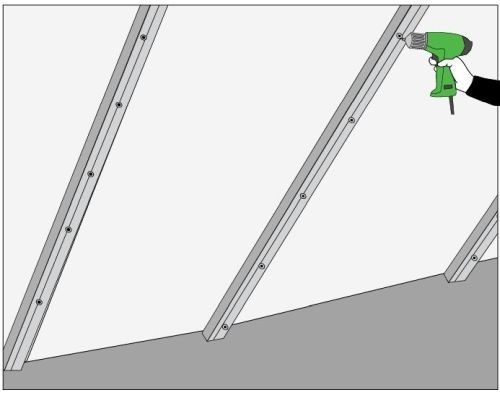
- To make the design reliable, they put an additional counter-lattice. The second layer of insulation is also laid there - this is especially true for Siberia and the northern regions.
Thus, it is better to insulate the roof from the inside, and it is optimal to do this even at the construction stage. Although even if the structure has been erected for a long time, it is quite possible to install thermal insulation or replace it with a new one. This will require a minimum set of tools, so you can cope with the work even without special experience and equipment.