Sterilizing jars is a key stage in preparing for winter preparations. This process helps destroy microorganisms, ensuring the integrity of the canned food. Jars are usually sterilized in the oven or steamed, but can jars be sterilized in the microwave? Yes, and in this article we will look at how to sterilize jars in the microwave effectively and safely.
The content of the article
- Why is sterilization necessary?
- Preparing jars and lids
- Sterilization process
- How to sterilize jars without water
- Procurement of products
Why is sterilization necessary?
Sterilization of jars is a critical step in the process of preparing food for long-term storage. It prevents the proliferation of microorganisms that can cause food spoilage and illness in humans. The main aspects and benefits of jar sterilization include:
- Sterilization kills or inactivates harmful microorganisms, including bacteria, viruses and fungi, that may be present on or inside jars. This ensures the food is safe for consumption.
- By killing microorganisms and delaying their subsequent reproduction, sterilization significantly increases the shelf life of products, allowing them to be stored for a long time without loss of quality.
- Sterilization helps preserve the flavor, texture, and nutritional properties of foods while protecting them from unwanted changes caused by microbial activity.
- Preparing food by sterilizing jars can be cost-effective because it allows you to purchase or prepare food in season when it is available at a lower price and store it for later use.
Sterilizing jars is an investment in food safety and quality, which ultimately results in economic benefits and consumer satisfaction.
Preparing jars and lids
The initial cleanliness of jars and lids is the key to successful sterilization. What to pay attention to during the process:
- Remove all visible food debris, dirt or other materials from jars and lids before sterilizing.
- Use effective detergents to remove fats, oils and other contaminants from the surfaces of jars and lids.
- Use clean and suitable brushes or sponges to thoroughly clean jars and lids.
- Rinse jars and lids thoroughly with clean water after washing to remove any remaining soap and other detergents.
- Inspect jars and lids for cracks, chips, or other damage that could become a source of contamination.
- Ensure jars and lids are completely dry before beginning the sterilization process.
- Preheat jars and lids to kill any microorganisms and prepare them for the sterilization process.
- Select the appropriate sterilization method depending on the type of product and the material of the jars and lids.
- Follow sterilization time and temperature recommendations to ensure the process is effective.
- After sterilization, ensure that the lid seals on the jars are tight to prevent possible re-contamination.
After thorough washing, you can proceed to sterilizing the jars in the microwave.
Sterilization process
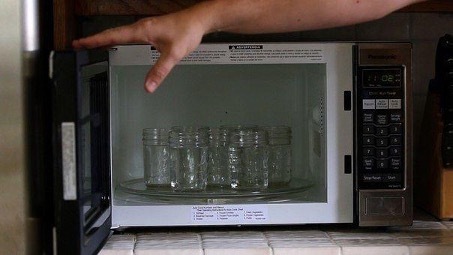
The process of sterilizing jars in the microwave is simple and takes little time, but requires attention:
- Fill each jar with water approximately 1 cm from the bottom.
- Place the jars in the microwave at a distance from each other for even heating.
- Set the maximum power and time to 4-5 minutes for effective sterilization.
Once you have learned how to sterilize jars in the microwave for preparations, you can move on to the next step.
How to sterilize jars without water
Sterilizing jars without using water can be done in several ways. It is important to emphasize that the choice of sterilization method should be based on the recommendations of the jar and lid manufacturer, as well as the type of products that will be prepared. Here are some methods for sterilizing jars without water:
- Sterilization in the oven:
- Place clean and dry jars on a baking sheet and place in a preheated oven at 160-170 degrees Celsius.
- Sterilize the jars for 10-20 minutes.
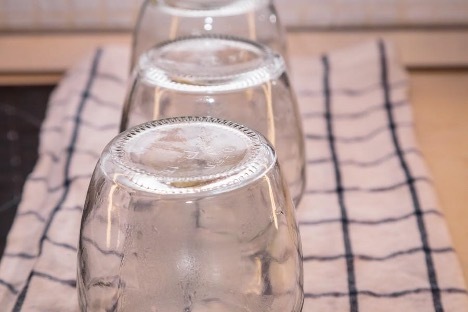
- Use oven mitts to remove the jars from the oven and let them cool on a clean towel.
- Microwave sterilization:
- This method is only suitable for jars made from microwave-safe materials.
- Place clean, dry jars in the microwave for 1-2 minutes on high.
- Sterilization using chemicals:
- Use approved jar sterilizer chemicals, following the manufacturer's instructions.
- This usually involves wiping down the jars and lids with a special solution and then letting them dry completely.
- If a combi oven is available, you can use it to sterilize jars without water by selecting the hot dry setting.
When choosing a waterless sterilization method, it is important to ensure that it effectively kills microorganisms and is suitable for the materials used in the jars and lids.
Procurement of products
Immediately after sterilization, begin preparing the products:
- Place the food in jars and close them with sterilized lids.
- Make sure the lids are tightly closed to ensure the food is securely stored.
- Beware of burns; it is better to use gloves and long sleeves.
Thorough sterilization is an important step to successful food canning. The microwave offers a quick and convenient method for sterilizing jars that you can easily do at home.