Sanding walls after puttying is an important stage in the interior decoration of a room; it allows you to eliminate unevenness, roughness and other surface defects. The implementation of the wall sanding process requires the selection of tools and materials, for example, a grinding machine, sandpaper, brushes and other things. The article will help you understand how wall sanding is performed and what stages of work it includes.
Sanding putty surfaces is a process that includes several stages of work.
The content of the article:
- Why sand the walls after puttying?
- How to sand putty
- How to prepare for work
-
How to sand walls
- Treat the surface evenly
- Sand difficult areas by hand
- Change the sandpaper on time
- Use light
- Fix minor defects locally
- Remove dust before priming
- How to make grout without dust
- Tips from the masters to consolidate the lesson learned
- In custody
Why sand the walls after puttying?
After applying a layer of putty, even if the work was done by a professional plasterer, defects remain on the surface. These may be bulges or notches.
Even slight roughness can reduce the decorative qualities of the coating, especially if further finishing involves painting the walls. Sanding will remove unevenness and make the surface suitable for further finishing work.
How to sand putty
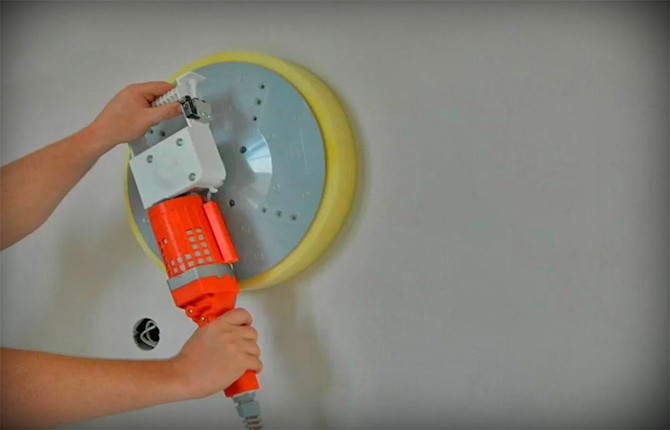
It is better to sand the walls after puttying using a special electric tool, such as a sander. This way the process will proceed faster, and the task will be completed with a noticeable advantage in the direction of quality. If your household does not have such a tool, try contacting an organization that rents equipment and rent the tool.
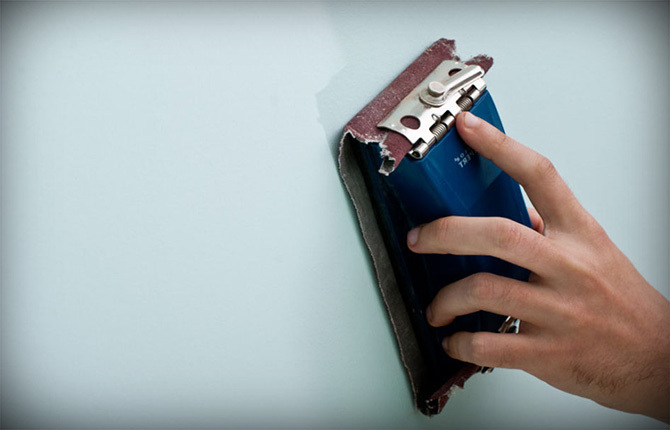
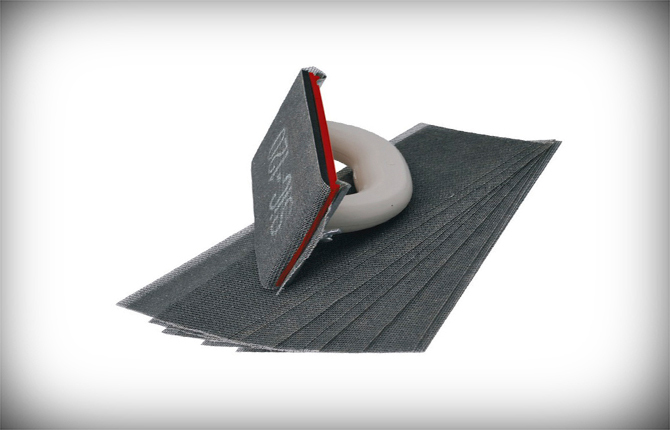
If this option does not work, then all that remains is to pick up regular sandpaper and move on to manual sanding of the walls. To make this process easier, prepare a small block of wood and attach an emery sheet to it. For difficult areas, a sanding sponge can be useful.
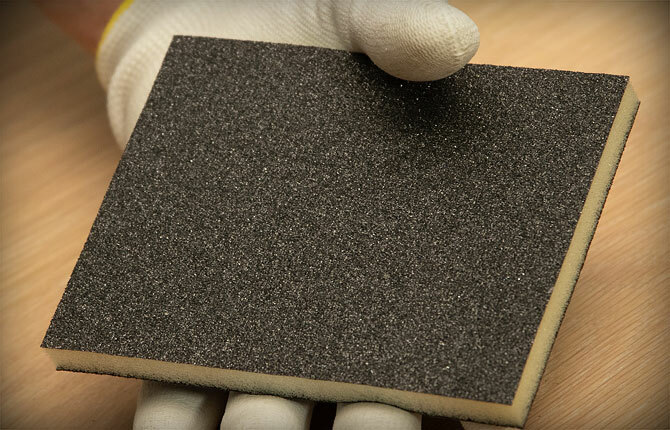
This is what a sanding sponge looks like. If necessary, you can make such a device yourself by gluing a piece of sandpaper over a kitchen sponge.
Not every sandpaper is suitable for processing walls:
- If the goal is to even out large differences, then paper with a coarse abrasive - P120 grit - is suitable. However, after such treatment, scratches remain on the surface. This option will not require secondary processing if further finishing involves gluing thick wallpaper. Scratches will be hidden under the wallpaper.
- If the ultimate goal is to obtain a flat and, as smooth as possible, surface, then pay attention to specimens with grit P180 or P240. It will not be possible to get a mirror coating, but the wall will still be smooth. The method is recommended for walls to be painted.
As a rule, sanding is carried out in several stages with alternating changes in sandpaper grit. This is the only way to achieve high quality wall polishing.
Attention! There are several types of grinding machines, but not all of them are suitable for such work. It is better if it is special equipment with an eccentric mechanism. Depending on the volume of work performed, you can select the desired diameter of the device’s working platform.
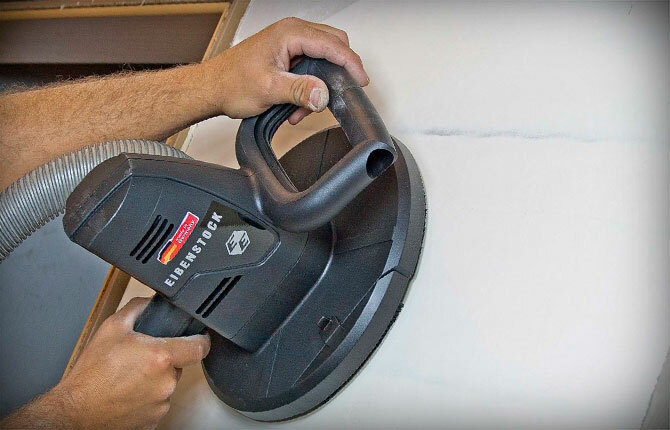
A good option for sanding is a machine with a round pad.
How to prepare for work
Sanding walls after puttying requires preparation. Since sanding is a dusty process, before starting the main work, complete some stages of work:
- the room should be as free as possible - take out all the furniture;
- if you couldn’t take something out, cover the remaining items with film and secure with tape;
- take care of the safety of the floor covering - also lay plastic film on top of it;
- close all ventilation ducts in the room.
Be sure to take care of your own health: protect your respiratory organs, eyes and skin from dust, wear goggles, a respirator and gloves.
How to sand walls
Wall sanding is carried out from top to bottom. If the ceilings are high, then you can use construction trestles. If necessary, such devices can be put together with your own hands from available material.
Another option for a device is a hand grater. An abrasive mesh or sandpaper is put on it. The grid is more practical.
Treat the surface evenly
Sanding the walls is carried out with careful circular movements. There is no need to rush, remove gradually in small layers. If work is carried out with an electric grinder, it is not recommended to stop the movements. There is a risk of leaving deep grooves that can only be corrected by re-filling the area.
Attention! The experience of sanding walls comes with experience. If it is not there when you start work, then after trying it several times, you will understand how hard to press on the device and how to behave in certain areas.
Sand difficult areas by hand
Any wall contains difficult areas that cannot be processed with an electric sanding tool. On one wall these are only corners; on others there may be niches and protruding parts of an engineering structure. For example, it is very difficult to pass areas behind radiators.
In this case, there is nothing else left to do but proceed to sanding the walls manually. Sandpaper attached to a block is only suitable for rough processing of difficult areas. If you need to carry out jewelry work, you cannot do without a sanding sponge. In some cases, craftsmen bend the sandpaper in half to get to the most difficult places.
Change the sandpaper on time
When starting to sand the walls, it is necessary to replace the worn-out sheet from time to time. As a result of puttying work, the grains from the paper gradually fall off and the material becomes unsuitable for further processing of walls.
Buy several sheets of abrasive to stock. This will save time and nerves.
Signs that replacement is needed:
- for the result of grinding, you have to press harder on the tool or it is discovered after processing the wall;
- The original appearance has not changed and the wall needs to be sanded again.
The unsuitability of sandpaper for further work can be seen by examining the working side. Once clogged with chalk, it can be periodically upholstered, returning it to its previous state, but over time, such actions will no longer help. In such a situation, all that remains is to replace the circle with a new one.
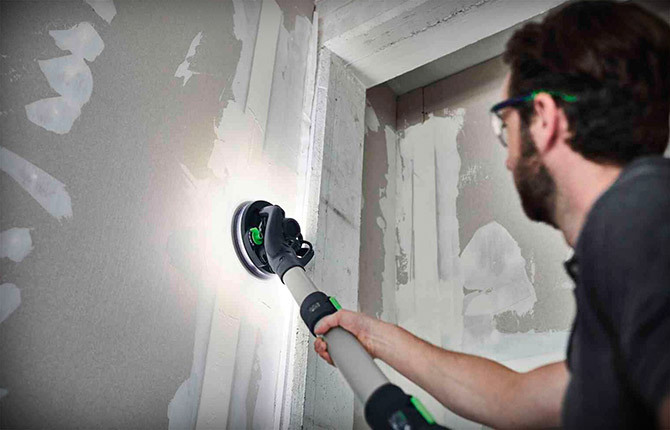
Use light
Illumination of the surface being treated is a very important point in sanding walls. To do this, you need to use a directional light lamp, that is, simply carrying it will not help in this situation. The best option is a small LED spotlight. Too much media power will be unnecessary, 50-70 W is enough.
If you don’t have an assistant and there is nowhere to secure the spotlight, use a headlamp. The effect will be a little worse, but it will still be able to detect major errors.
Some equipment comes complete with lighting fixtures. This method of illumination cannot be called complete, but for small volumes such an addition is also suitable.
It is better if the light slides along the wall. To do this, you can independently build a tripod from timber and attach a spotlight to it. Install it in one of the corners and direct the light along the wall. This way you will be able to see the smallest defects that are invisible under ordinary scattering light.
Fix minor defects locally
If after sanding the walls there are potholes or scratches left, do not focus your attention on them and leave this work to be eliminated at the next stage. After you finish troweling, dilute a little finishing putty and spread the problem areas with a small spatula. Once the putty has dried, sand again.
Remove dust before priming
Before proceeding to priming the walls, collect all settled dust from the surface. It would be a good idea to completely clean and wash the room. Thus, dust settled on the floors will not rise into the air.
For cleaning, it is better to take a professional construction vacuum cleaner. If you don't have it in your toolbox, you can always rent equipment.
Advice!Never use a household vacuum cleaner. It is not suitable for such tasks, and after cleaning one room, most likely, it will fail forever.
When going through hard-to-reach areas, use a paint brush. A suitable option for wallpapering is a wide and rectangular brush.
How to make grout without dust
Some builders use a vacuum cleaner while sanding walls to reduce dust levels in the air. To do this, the hose from the device is inserted directly into the grinding machine. All that remains is to connect both devices to the network and start working. The inconvenience is that you have to carry the vacuum cleaner hose, and sometimes the vacuum cleaner itself, which complicates the work. But everything is much simpler if there is a faithful comrade nearby who will help in difficult times.
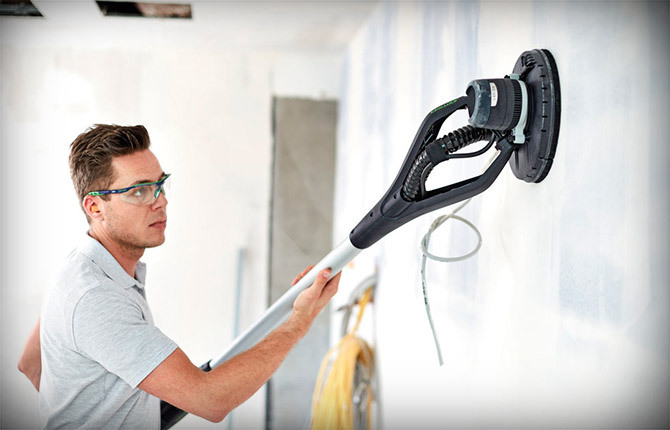
Most sanding devices are already equipped with an input for connecting a vacuum cleaner. If there is no such hole, then it is better to call a friend for help.
This is all good, but this method does not provide complete protection from dust, so do not forget about personal protective equipment for your eyes, respiratory system, hair and skin. When the sanding equipment is removed from the wall, some of the dust will rise into the air.
Tips from the masters to consolidate the lesson learned
Adviсe:
- To speed up and facilitate the work process, use a grinding machine. The manual method is suitable for eliminating defects in hard-to-reach areas.
- Sanding the walls is done using uniform circular movements. In this way, an even layer of small thickness is removed.
- As soon as the abrasive ceases to cope with sanding the walls, carry out a mandatory replacement. The reason may be a loss of grit or the sanding wheel may become clogged with chalk dust.
- Illuminate the area using directional lighting equipment. It is correct to periodically change the direction of the light.
- Use a construction vacuum cleaner. After finishing work, thoroughly clean the room.
- Don't forget about personal protective equipment.
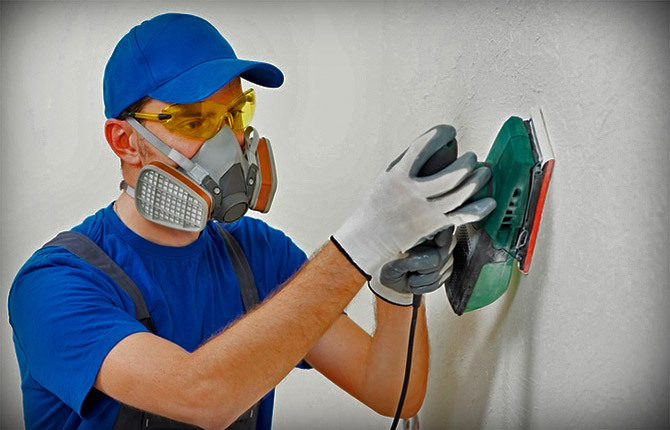
In some cases, skin protection products can be ignored, but chalk dust cannot be allowed to settle on the lungs.
In custody
Proper sanding of walls after puttying is the key to an ideal final design. If you follow all the rules and regulations, you can achieve an amazing effect, saving your time and effort! The recommendations given in the material are universal, that is, they are also suitable for polishing the ceiling.
Have you ever had to sand walls yourself after puttying? What methods did you use: manually or using power tools? Share your impressions. Dear guests and regular users of our website, share the link to the article on your social networks and save the material in your bookmarks.