The snow shovel is a tool that still gives big competition to snow blowers. Over time, it has not lost its popularity and demand due to its low price and ease of use. And if you do it yourself, then its value increases significantly.
The content of the article:
- What should a shovel be like for snow removal - design requirements
- Choosing reliable material
- Preparation of the drawing
- Preparing materials and tools for making a snow shovel
-
Step-by-step instruction
- How to make your own ladle
- How to make a shovel handle
- How to make a holder correctly
- Assembling a shovel for snow removal
What should a shovel be like for snow removal - design requirements
First, you need to indicate that you have to remove snow with a shovel. And the more of it gets on the work surface, the faster the cleaning is done. But there is another factor: the more snow captured by the tool, the harder the work becomes. This means that you need to take into account your own body parameters.
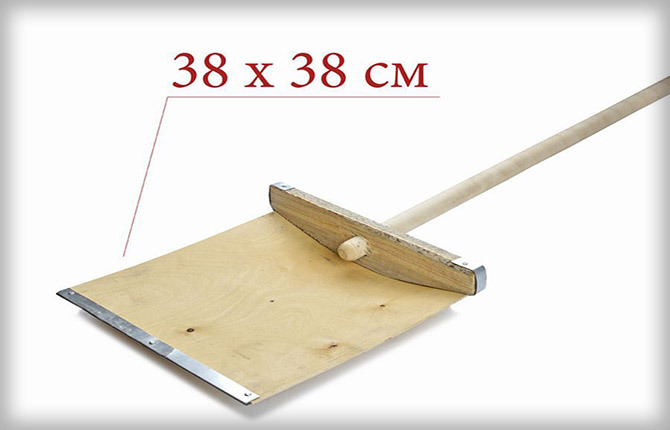
And since different people can work with a shovel, accordingly, an average size of the width of the working body is needed. And this parameter is a width of 40 cm. In this case, the shape will be rectangular.
As for the rectangle, there are also certain requirements. That is, the depth of the shovel, and this is the distance from the outer edge of the working body to the handle, should not be greater than the width of the scoop. The dimensions can be equal to each other, which means the shovel will be square.
Secondly, it is necessary to take into account the length of the cutting. This size affects not only the convenience of snow removal work, but also the efficiency of the operations. If this parameter is not suitable for a person’s height, then the efficiency of snow removal decreases.
A person will simply get tired faster. Therefore, for a snow shovel, the average length of the handle should be 135 cm. It is this size that allows both tall and short people to work with maximum comfort.
Today there are tools on sale with retractable handles. This allows you to adjust the length to your own height. But since we are talking about a homemade shovel, it is better to use the dimensions indicated above in production.
Thirdly, not the least important factor when choosing a shovel for snow removal is the materials from which it will have to be made, which we will discuss later.
Choosing reliable material
The handle is usually used with a round cross-section. It can be made from three materials:
- metal pipe;
- plastic pipe;
- wooden stalk.
The plastic element is unreliable and may break under load. The handle swells under the influence of humidity, increasing in size, which causes certain inconvenience when gripping the handle with your hands. A metal pipe is both the strongest material and the most durable; it is not afraid of moisture and shock loads.
But metal has three disadvantages:
- It is heavy, which increases the load on the body of the person removing snow. Work efficiency immediately drops.
- Metal is more expensive than plastic and wood.
- In cold weather the handle is always cold.
The last point is not so important, because snow is usually removed with gloves when shoveling. In addition, you can always wrap the handle, for example, with electrical tape.
Still, when making a snow shovel with your own hands, it is better to give preference to a wooden handle. Firstly, here you can use material not only with a round cross-section, but also with a rectangular one.
Secondly, wood is convenient for processing, because often the handle has to be adjusted not only in length, but also in cross-section. This does not require any complex tools and equipment.
Thirdly, cuttings are cheap, plus there is always a piece of thick board or ready-made slats at the dacha. It is easy to make a handle from this lumber. Fourthly, attaching it to the shovel scoop is as easy as shelling pears, which will be described below. You can also add ease of repair to the advantages.
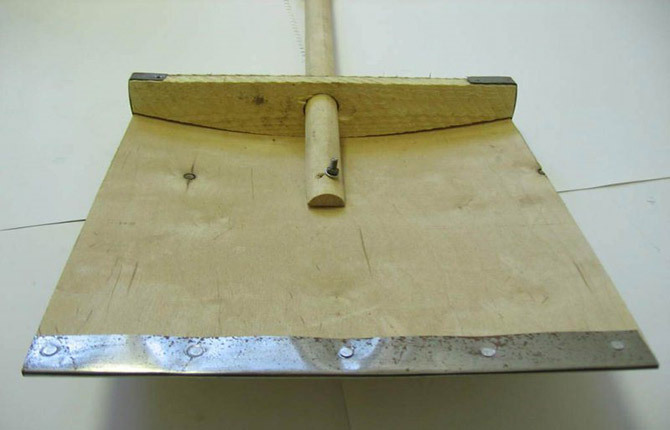
Now about the bucket, that is, about the working body. It is optimal, of course, to make it from sheet iron, preferably galvanized. But metal, as mentioned above, increases the weight of dacha equipment.
At the same time, the metal bucket is very reliable and will serve for a long time. Therefore, if the choice fell on him, then with such a shovel it will be possible to remove heavy snow that has accumulated over long days, or to chop up ice.
But since the task is to make a shovel with your own hands, that is, without high costs, it is better to choose ordinary plywood for making a bucket. Yes, it is not so durable and will quickly fail if exposed to moisture. But it has a lot of advantages in terms of manufacturing:
- can be done quickly;
- monetary costs are minimal, in some cases zero due to the presence of used materials at the dacha;
- The simplest tools are used in production.
Attention! To make a wooden shovel you will need plywood 4-5 mm thick.
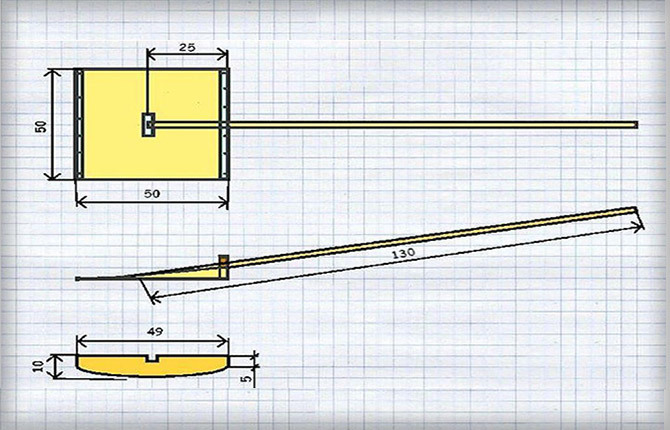
Before you go directly to work, you need to sketch out a small sketch. It will simply help you not to deviate from the chosen sizes in the future.
Preparation of the drawing
In the design of a snow shovel, in addition to the handle and bucket, there is one more element that ensures the angle of inclination of the handle relative to the surface of the plane being cleared. It is also shown in the photo below. It is this slope that makes snow removal easier.
This element is a kind of holder for the cutting. Its dimensions must also be indicated on the drawing. And they must match the dimensions of the working part of the shovel. All parameters in the photo are indicated in centimeters.
Preparing materials and tools for making a snow shovel
Materials you will need:
- a piece of plywood;
- a ready-made cutting or wooden lath, you can take a board 4-5 mm thick, from which you can cut a square or rectangular lath;
- a strip of galvanized sheet metal 0.8-1.0 mm thick, 10 cm wide and a length equal to the width of the snow shovel bucket;
- screws and nails;
- board for making a holder 3-4 mm thick.
Tools for making a shovel:
- saw;
- jigsaw;
- drill or screwdriver;
- sandpaper.
Step-by-step instruction
It is necessary to start making shovel elements for removing and clearing snow separately. It doesn't matter in what order. The simplest thing is to make a ladle.
How to make your own ladle
For this:
- Dimensions from a previously prepared drawing are transferred onto a piece of plywood;
- for this you can use a simple pencil;
- Next, a piece is cut out with a jigsaw or saw, which will perform the main functions of a shovel: collect snow.
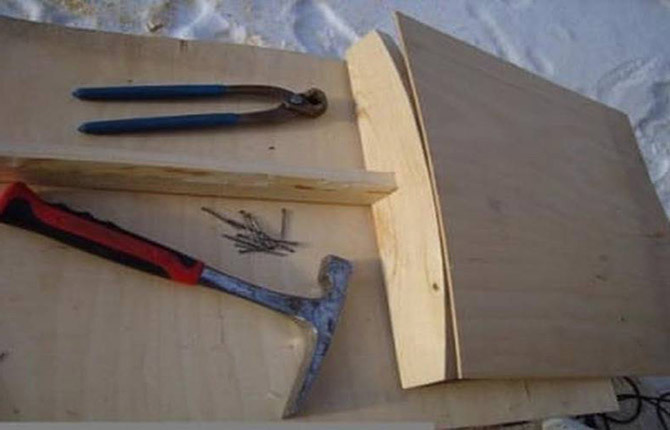
The preparatory stage of making a shovel bucket for clearing snow includes one more operation. This is the strengthening of the outer edge of the working body. For this, a strip of galvanized sheet iron is used. You just need to bend it in half lengthwise. This can be done in different ways. For example, one of the simple ones:
- clamp the strip between two pieces of board so that half of the sheet protrudes above the two elements holding it;
- insert this entire device into a vice and clamp it;
- use a hammer to bend the protruding part of the metal strip until it stops, that is, to the board;
- remove it all from the vice;
- Bend the strip manually using a hammer so that it forms an angle in cross section.
Then the prepared element is put on the outer edge of the plywood scoop and attached to it using self-tapping screws or nails. This snow shovel will last several times longer.
How to make a shovel handle
The second element is the handle. There are no complications here either - simply apply the length, and cut off the excess with a saw. To keep the handle smooth and free from burrs, it is recommended to treat it with sandpaper. The latter is wrapped around the cutting and the top uneven thin layer is removed with longitudinal movements.
How to make a holder correctly
The most difficult element of a wooden snow shovel to make is the holder. It has a rounded shape on one side. But making it with your own hands is also easy. To do this, the dimensions are applied to the selected board exactly as indicated in the drawing.
Next, all the points are connected to each other using a simple pencil. Then either a saw or a jigsaw is used. The latter is preferable because rounded shapes are not so easy to make with a saw.
Now you need to make a through hole in the holder for the handle. Firstly, it should be slightly larger in diameter than the diameter of the cutting, which is 40 mm. Secondly, the hole should pass through the holder at an angle, which will create an inclination of the shovel. By the way, this parameter has a size range of 20-25⁰.
So, how to make a hole at an angle:
- on the plane of the holder, a circle with a diameter slightly larger than the diameter of the section of the handle is drawn with a compass;
- blind holes are drilled around the circumference perpendicular to the plane using a drill and a drill bit with a diameter of 5-6 mm, the depth of which is no more than 5 mm;
- now through them, only at an angle of 20-25⁰, through holes are drilled;
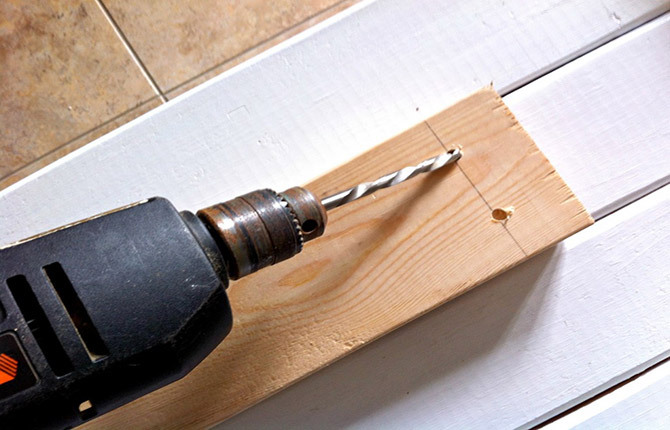
- use the same drill to remove the partitions between the holes;
- the cut wooden circle is knocked out with a hammer, more often it falls out on its own;The internal surfaces of the hole are processed with a file with large notched teeth.
The question arises:how to maintain the required tilt angle of 20-25⁰? The easiest option is to use a regular school protractor. You just need to place it near the blind hole and, choosing an angle, guide the drill along it.
And the last operation in the manufacture of a shovel holder is to sand all surfaces of the wooden element with sandpaper. Particular attention is paid to planes cut transversely or obliquely.
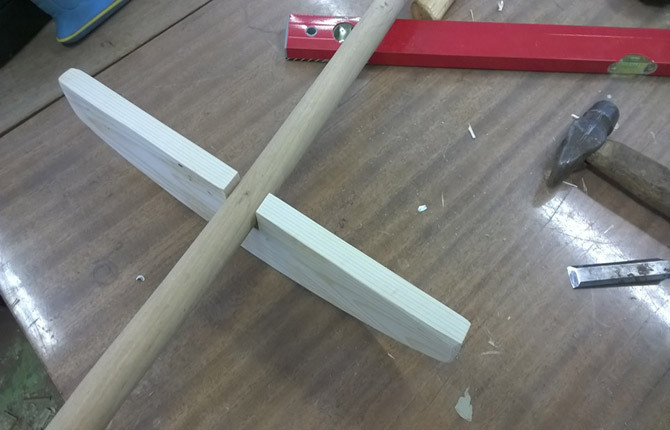
There is a much simpler option for making a hole in the snow shovel holder. It's not even a hole, but a slot. It is made with a saw or jigsaw from the side of a flat, not rounded, end. The depth of the slot is slightly greater than the diameter of the handle. 1-2 cm will be enough to form an angle of inclination of the handle relative to the scoop.
This option has one drawback: the handle in the holder will not hold firmly. Therefore, the first one is additionally secured with nails or self-tapping screws, screwing them in or driving them in at an angle. One must be vertically on top.
In this case, additional fasteners are installed in the form of a metal strip, which is mounted on top of the shovel handle. The fasteners are the same: screws or nails.
Assembling a shovel for snow removal
All parts of the shovel are ready. All that remains is to assemble it into a single structure. The algorithm is as follows:
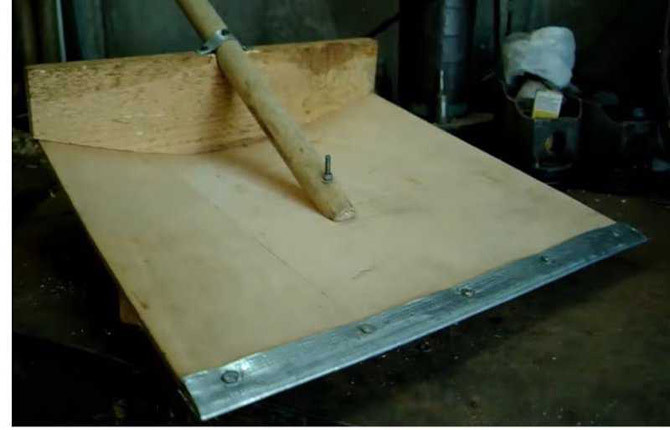
- First, the plywood bucket and holder are connected to each other. The second is laid on a flat surface with the rounded side up.
- A prepared piece of plywood is applied to the end, which is attached to the holder with screws or nails. It is important here that the plywood part fits exactly on the end of the holder. That is, without protrusions on one side.
- Next, the handle is inserted into the holder until it stops so that its end touches the upper surface of the scoop.
- The handle is attached to the bucket.
- To ensure that the handle is held firmly in the holder and does not play, the first part is attached to the second part on both sides with nails or self-tapping screws.
So, the shovel with which you can remove snow is ready. By the way, this design can be improved. That is, make a scraper on wheels out of it. You will have to buy the latter; you cannot make them yourself. Here it is important to correctly attach the wheels to the handle.
To do this, you will need a metal axis in the form of a pipe and a piece of pipe, with the help of which the fastening will be carried out. Both pipe parts are connected to each other by welding. The shape of the connection is perpendicular to each other. Fastening the wheelset to the handle using a steel or plastic clamp.
Of course, it is difficult to push snow with such a shovel. The angle of inclination relative to the snow surface is not the same. That is, it will not effectively perform the functions of a scraper. On the scraper, the working part should be positioned vertically.
But, as a children's option, such a shovel is quite suitable. It will be great fun for a child to play with snow. You just have to guess the sizes. In general, manual scrapers are difficult to work with. In this case, it is better to give preference to the automatic option - a walk-behind tractor.
Dear readers, what do you think is the best material and size to make a snow shovel from? Leave comments, share the article on social networks and bookmark it.


