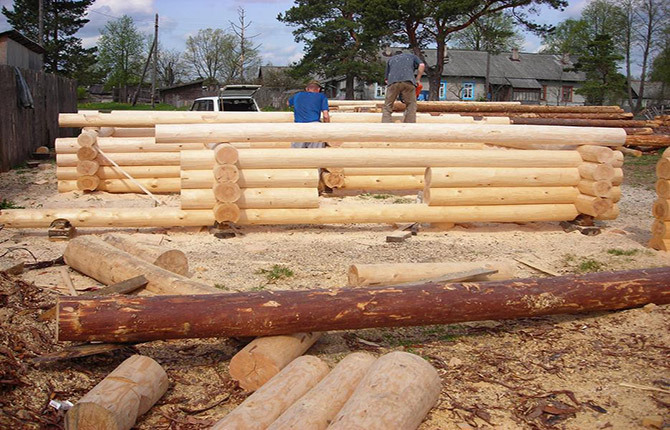
Making a frame into a bowl for a log bathhouse or home is much simpler than other assembly methods. The main thing is not to get confused. It will be easier to master the process of washing down a bowl on a half-tree log if you draw up step-by-step instructions for marking and sequentially cutting the material.
The content of the article:
- Features of pairing “in the bowl”
- DIY construction tools
-
Preparatory stage
- Material selection
- Sorting and trimming the trunk
-
Marking
- What is a carpenter's trait and how to work with it
- Sequence of actions when working with a simple line
- Marking with a carpenter's compass
-
Cutting grooves and bowls
- How to properly file a bowl with a spike
- Results
Features of pairing “in the bowl”
For the beginning carpenter, it is better to choose a simpler design known as the "half-tree" design. This name arose from the fact that each log, laid in a corner, is cut into a cylindrical groove, approximately half the thickness of the tree. In addition, a longitudinal groove is cut along the log along the supporting surface to a depth of 1/7 of the diameter.
There are also more complex versions of a bowl-shaped frame, for example, a Canadian one with a tenon (also called a “tail-shaped” one) or a lock with a ridge. But these methods are used for special cases. For example, if you need to strengthen the corner of the frame or make the connection into the bowl more dense and airtight.
Features of making a log house in a bowl:
- simpler marking technology than options with a comb or “tail tail”;
- cutting down the bowl can be done with a regular chainsaw with a shortened bar;
- after shrinkage is completed, the connection into the bowl turns out to be denser and warmer than the options for pairing into the claw.
In addition, a log house sawn into a bowl at the corners results in a tighter fit of the crown. The width of the contact area between the rims can be up to 100 mm, and thanks to the concave shape of the groove, the seam retains heat no worse than tenoned or tongue-and-groove timber.
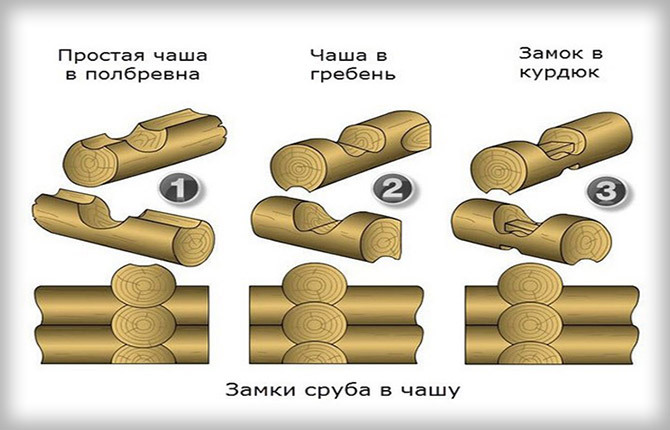
Options “with a comb” or “fat tail” are considered warmer and more durable than the “half-wood” bowl design, but to wash them down it is not enough to know the theory of marking and selecting wood. You need to correctly make the key and tenon for the lock on the corner of the log house. In this case, at least half of the work will have to be done manually using hand carpentry tools.
DIY construction tools
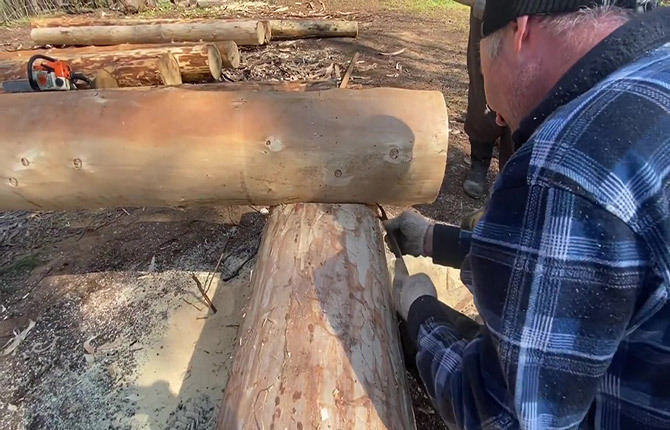
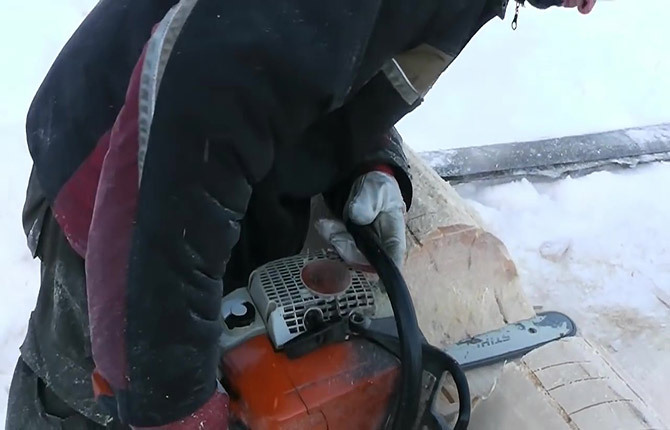
To build a small log house you will need a standard set of carpentry equipment. Recently, the most important tool for building a log house is a chainsaw. It is better if it is a low-power (light) version of the Shtil or Huksvarna with a tire up to 40 cm (but not a brush cutter). Plus be sure to wear headphones, glasses and gloves.
Since logs up to 30 cm are traditionally used for a sauna log house, a short bar of 40-50 cm and the lightest chainsaw should be enough. This is important, since most operations, not only washing down the bowls, but also cleaning, trimming, and leveling the geometry, are performed with a chainsaw. Plus at least one spare chain and sharpening tool.
You can use a more powerful and heavier model of gas powered tools, but if you consider that they will have to be managed all day long when building a log house, the load on your arms and back will be very significant. It is convenient to work with an electric chain saw on a bowl, but only for leveling or finishing operations. It will not be possible to install the entire log house with an electric saw.
If a team is working, then, as a rule, they have two chainsaws. One is used to remove wood from the bowl. Since the cut has to be made in a curved direction, over time the bar on which the chain runs is deformed to the point of a propeller in such a chainsaw. It becomes impossible to cut ends and straighten straight cuts with such a tool, but sawing down the bowl of a log house is quite suitable.
Professionals also use specialized marking and milling equipment from well-known brands Maffel, Parent, Bosch. With such devices you can immediately cut locks without resorting to constant adjustments of parts.
For straight cuts, any chainsaw or power tool can be used, but curved transitions are not made so as not to disturb the geometry of the tire.
The minimum tools for washing down a bowl are approximately the following:
- Carpenter's line or marking compass. It is better to buy a ready-made device.
- Carpenter's axe. It is always very sharp, smaller than usual for chopping wood, with a beard and a ground wooden handle for a one-handed grip.
- A construction bubble level, maybe a meter level, but usually a smaller size is enough.
- A set of chisels and at least one chisel.
- Tape measure, marking pencil or black marker.
- Wooden mallet and construction hammer 400 g.
You can grab a sledgehammer with a couple of hard rubber pads for the butt end of the log. A sledgehammer is used to set crowns in log house locks. Sometimes, for a tighter and safer fit of the crowns, they use not a sledgehammer, but a piece of thick log 60-80 cm long with handles-brackets nailed to the sides.
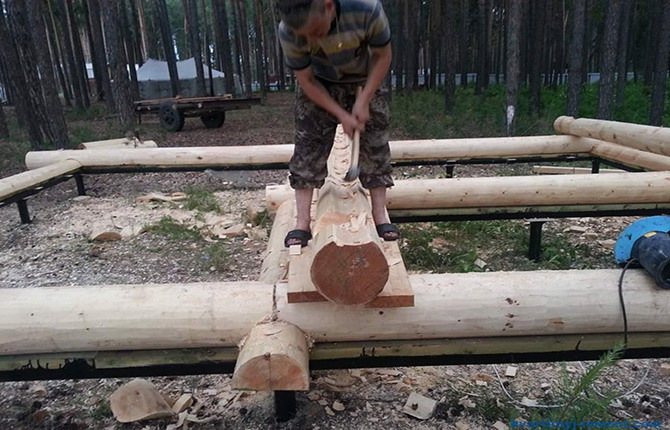
You will also need a special tool used by carpenters when assembling a log frame into a bowl. This is a skobel. It looks like a curved knife with handles on the sides for gripping and working with two hands.
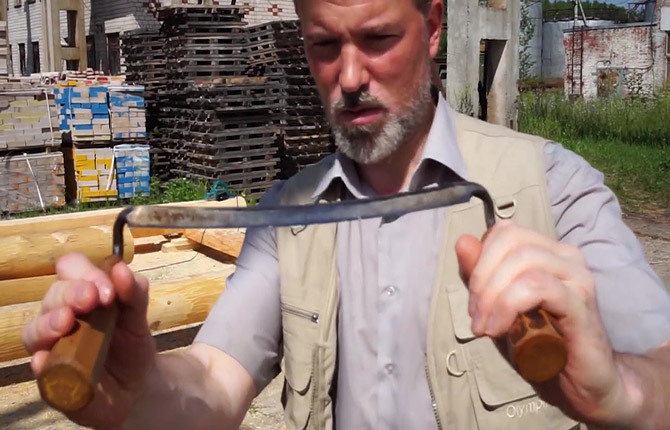
Many carpenters do not use staples on small log houses; this is allowed. But if you need a tight fit of the crowns, a beautiful appearance, so that no gaps are visible on the lock in the bowl, then it is better to trim with a staple.
Preparatory stage
Preparation takes approximately 20% of the time allocated for the construction of a log house. A modern log building should not only be durable, but also have a beautiful appearance.
Therefore, for a log house for a bathhouse in the forest, preparation can be done quite quickly: sort the logs, and you can start cutting out the bowls. In other cases, the material for the log house must be additionally prepared for installation.
Material selection
First of all, you need to sort the logs prepared for felling. It's not about quality, or even appearance. It is clear that all material must be dried, kept under a canopy to stabilize its dimensions, and cleared of bark.
If you are building a log bathhouse, it is best to use pine. Its wood is quite stable and dense; cutting a lock bowl is quite easy even for a beginner. Exceptions are the first (lower) two crowns of the foundation. For this part of the log house you need to look for at least larch. The lower part of the frame - the frame crowns rot, and after 5-6 years they have to be replaced.
Treatment and impregnation help little; the liquid penetrates into the thickness of the sapwood only a couple of millimeters.
The durability of the log laid in the log house is also influenced by the method of washing down the bowl, as well as the scheme for laying the logs in the castle. It is best to use the Russian version, “in a big way.” This is when a bowl is cut into the bottom of the top log. Rainwater drains without getting inside.
Sorting and trimming the trunk
The next step is to sort the logs. Tree trunks differ in diameter, so the dimensions of each trunk are first measured or determined by eye. The top of a tree is always smaller in diameter than the root part.
Sorting is done for three reasons:
- Choose the thickest and most massive logs for the first two crowns. Immediately after assembling the frame, the locks will account for up to 20% of the weight of the superstructure, but as shrinkage occurs, the load will increase. Therefore, the lower bowls must be cut without defects or errors.
- The frame of the log house will look symmetrical if material of approximately the same diameter is selected for the crown of four logs. This sorting makes it easier to wash down the bowl and assemble the lock.
- From the total mass, you need to select logs whose diameters at the ends are very different.
You can make a log house from such trunks. The process is simply complicated by the fact that you will need to alternate the direction of laying the logs in the wall. As a result, the wall of the log house will look more or less even, but the strength of the castle in the bowl will be reduced.
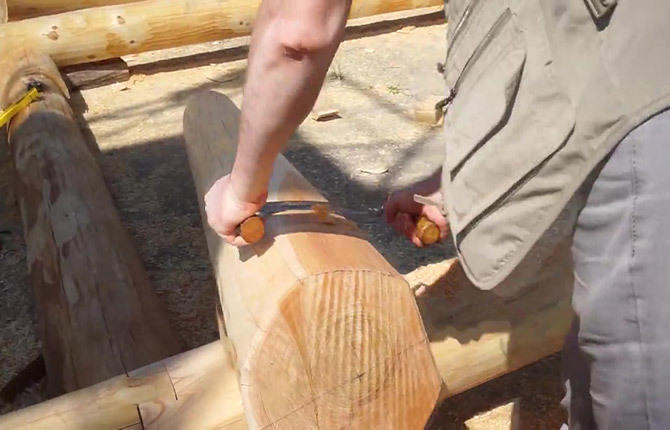
If it is necessary to ensure a more elegant appearance and at the same time increased strength of the joints, then the thickened ends of the logs are trimmed during preparation. Using a scraper, a few millimeters of wood are removed in the places where the bowl was washed down and the longitudinal groove was cut.
Cut logs, as a rule, are not used for laying the first two crowns. Joining the trunks into a bowl at the corners becomes easier, but after processing with a staple, the thickness of the outer layer, the sapwood, decreases. Therefore, trunks are often cut into shorter pieces and used to assemble partitions inside a log house. In this case, the locks are made not with a bowl, but with a claw.
Important! You should not try to sand the log before assembling the frame. Perhaps this preparation method will remove traces of knots, smooth the surface, and make it easier to fill the bowl and further cut the longitudinal groove. But, in general, manual processing will not replace industrial rounding of the trunk using special equipment; it will only weaken the outer layer of sapwood. The walls of the log house need to be sanded after the first shrinkage of the frame.
Marking
The marking procedure begins with laying out the logs on the already assembled part of the log house. The trunk is laid out and secured with linings. Using a ruler (level), measure the extension of the end, and cut off the excess with a chainsaw.
If logs of large diameter are used for the log house, then you will need to draw two perpendicular diagonals on the cut with a marker. They will help to accurately determine the center of the cut circle and mark a horizontal median line on the side surface of the trunk.
What is a carpenter's trait and how to work with it
Two types of carpentry tools are used to mark the bowl. The first version of the device looks like a strip of metal with dovetail cutouts at the ends.
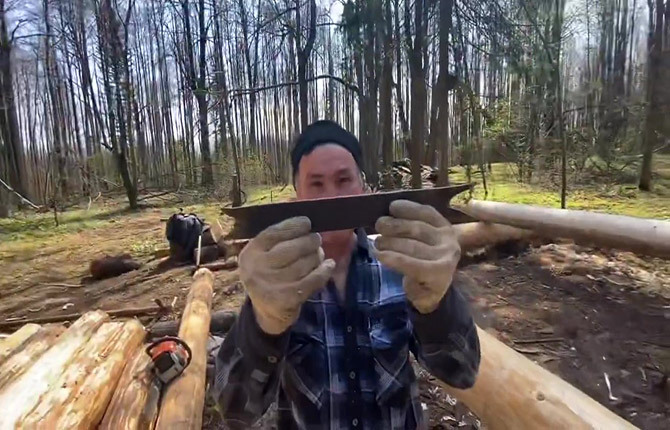
The distance between the pointed edges at opposite ends of the strip is different. The craftsmen explain that the choice of which side of the line to mark remains with the carpenter. But most often this is determined by the diameter of the log on the log house.
The second version of the marking device is called differently, sometimes also called a line, but most often a carpenter’s compass for marking bowls on log houses.

The device is similar to a compass, in which a plate with a dovetail and a marker (chemical pencil) is attached to one leg. At the second end there is a bubble level. This allows you to control the position of the compass when marking the bowl.
A compass is considered more convenient to use; it is possible to apply markings at one time. You can learn how to use the device correctly from the video:
If you use a simple carpenter's line, then you have to mark and file the bowl in several steps until the carpenter adjusts the depth of the saddle. Experienced carpenters, who work exclusively on the construction of log houses, can apply markings for cutting down the first time. Beginners have to first make rough markings, then, after checking, adjust the line of the bowl and repeat the cut according to the instructions.
Sequence of actions when working with a simple line
Before marking, the log must be aligned with the wall of the log house and securely fixed at the site of future installation. Usually a couple of wooden wedges are placed under the sides. This is enough to work with a compass, since the marking line is simply drawn with a marker or pencil on the surface.
If you work with a simple line, you will need additional fasteners. For example, the barrel must be held by assistants. If you make a log house alone, then the log often has to be tied to the already laid crowns of the log house.
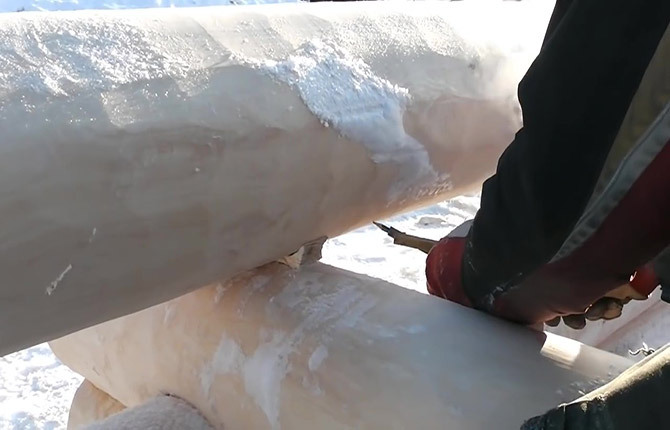
Marking begins from the top point. Holding the devices with your hands, you need to draw a line so that both ends touch the wood. The upper end slid along the surface of the log at the site of the future bowl. The lower one - along the already laid lower crown. You have to press quite hard on the device so that the marking marks are clearly visible.
The markings for the bowl are applied in two movements from the top: first in one direction, then in the other. Now you need to draw along the marks with a marker so as not to lose the markings in the process of washing down the bowl with a chainsaw.
Next, you will need to compare how high the horizontal median line drawn on the trunk is from the markings. Usually 30-60 mm remains, since the marking just completed is rough.
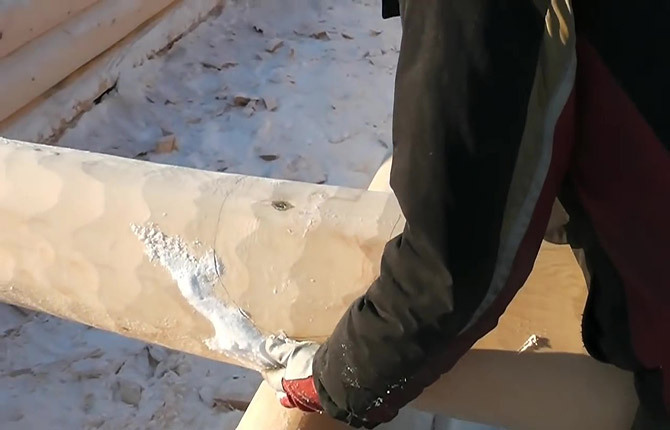
After washing down the bowl, the log is placed in place and the process of marking with a carpenter's line is repeated. Now the distance is decreasing, it must be constantly monitored so as not to “fail” the log. As a rule, the second or third marking reaches the level of half the diameter of the crown.
During the second trimming of the bowl, the surface is adjusted and cleaned so that a “saddle” with minimal gaps and cracks is formed in place of the lock.
Marking with a carpenter's compass
Despite the fact that the device is more complex, preparing the compass for work is not required.
After the log has been laid out on the top crown of the frame, you need to spread the legs of the compass, align it vertically, and then move it into the space between the new log and the top crown. As if you need to measure the distance between them.
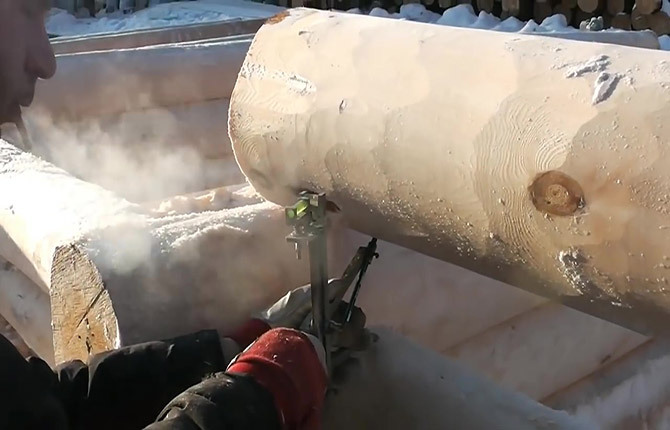
Next, the compass is pulled out of the gap, the opening of the legs is slightly reduced, literally by 8-10 mm, no more. You must remember to fix the legs of the compass.
Now you need to apply a marking line to wash down the bowl. To do this, the compass is installed on the “top” of the upper crown of the log house and aligned vertically, controlling the position of the device using the built-in level.
To draw a line, touch the surface of the crown with the lower leg, and draw markings on the new log with the upper leg (with a pencil).
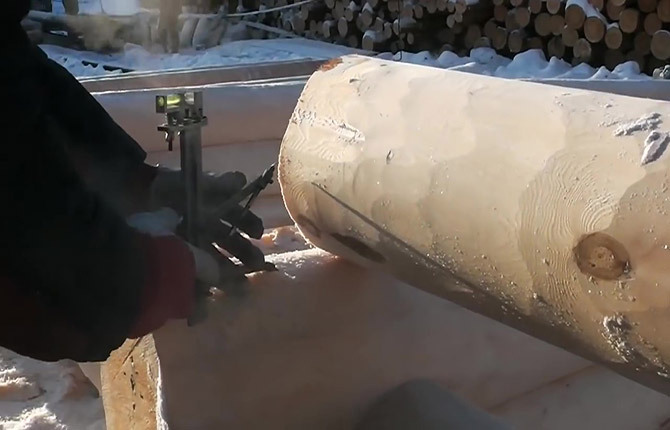
You will get half of the marking line, now you need to go and complete the remaining part with a compass.
In a similar way, you need to draw a line on the opposite side of the blank barrel.
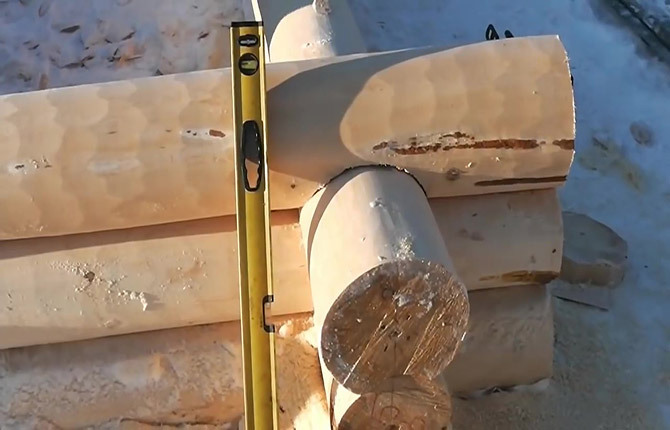
As a result of working with a compass, two marking lines for two bowls were applied to the blank log. It is very important to check how much they coincide and are in the same plane. This must be done before you start washing down the bowls, otherwise, if a mistake is made, the workpiece will lie loosely on the frame at one end.
To check, you need to remove the locking wedges and turn the log blank upside down. In this case, you need to align its position so that the marking distance to the crown on the right and left is the same.
Now you need to move to the second thicket and check what the distance is to the left and right of the marking to the crown. They must match too. It was a rough or dirty marking for washing down the bowl.
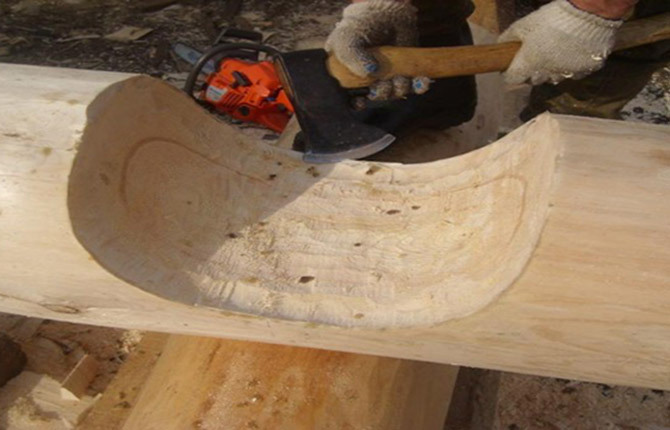
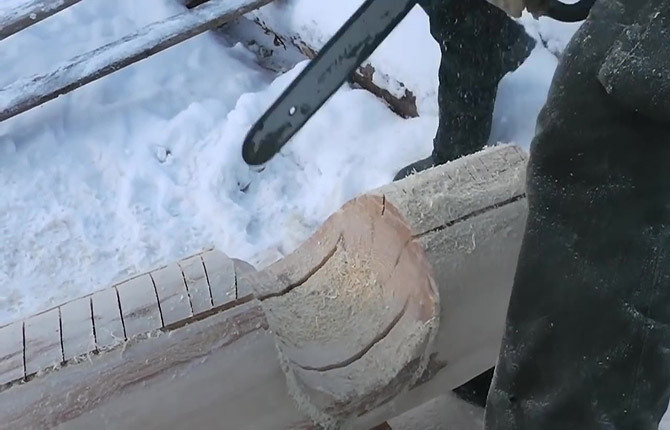
Cutting grooves and bowls
According to the log house construction technology, after preliminary marking of the log, you need to cut out the so-called dirty bowl. Using a special chainsaw with a “crooked” bar, all the wood is cut out according to the markings on both bowls.
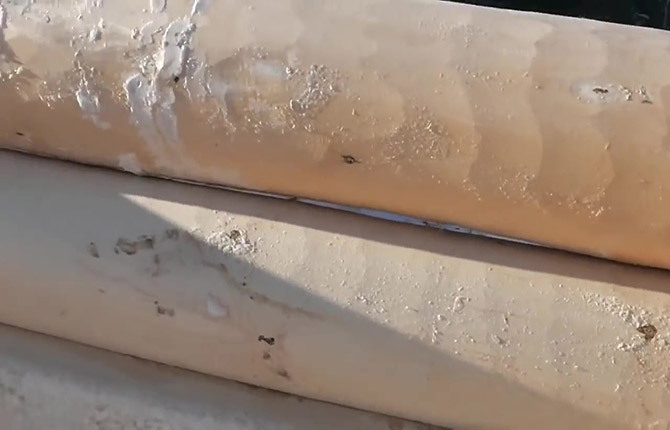
Afterwards, the log blank must be turned over and placed on the upper crown of the log house. The gaps, both at the lock and between the blank and the crown, are simply huge.
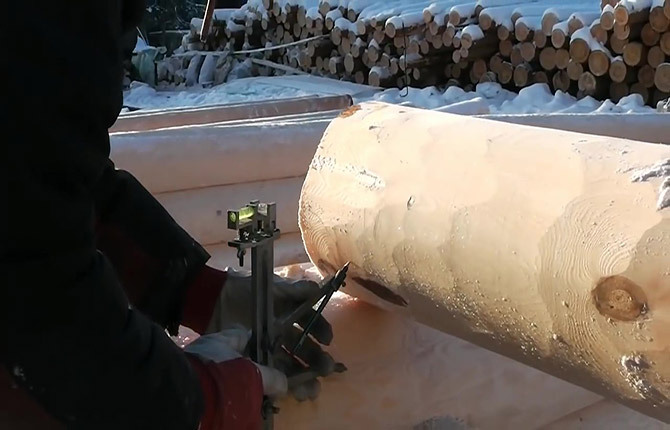
Now you need to make a second, final marking along the bowl and the joint line between the logs. The width of the lines is adjusted on the compass. Usually they find the place where the gap between the logs is the largest, apply a compass and spread the dovetail so that after cutting the groove the gap disappears.

Next, using the selected size, you need to draw a new marking line with a compass along the dirty bowl, as well as along the logs.

Next you need to draw a line on both sides. If somewhere the markings are not drawn, you will need to draw them with a pencil and a ruler. The entire finishing line should be clearly visible.

This is important, because after the log blank is removed from the log house, it will be impossible to restore the markings. Even if you put it back, the restored line will have an error; after assembling the frame, there will be a gap between the crowns.
How to properly file a bowl with a spike
If the log house is built from a sufficiently thick log, then, as a rule, there are no problems with the strength of the locks in the corners. But using expensive massive material does not always make sense, especially for small buildings.
For log houses made of moderately thin logs, as well as the first crowns of any log buildings, the connection into a bowl must be done with a tenon or fat tail.
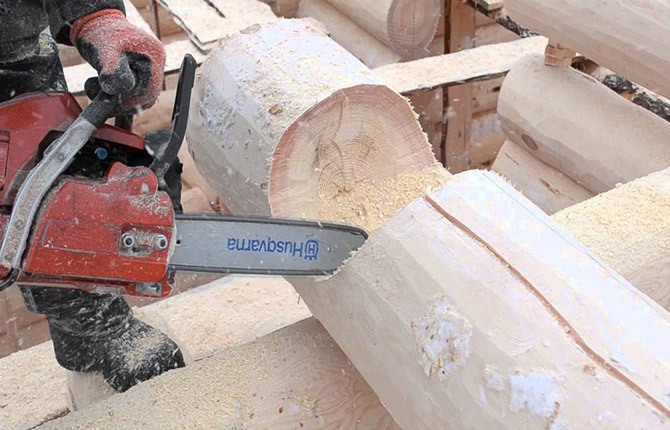
This part of the lock is cut out at the last stage, after the groove has been cut. First, use the nose of a chainsaw to cut two parallel cuts to the depth of the tenon.
Next, use a flat horizontal tire to grind the surface of the tenon and cut out the wood on the left and right to a depth of 60-70 mm.
Now you need to cut out the cheeks of the bowl.
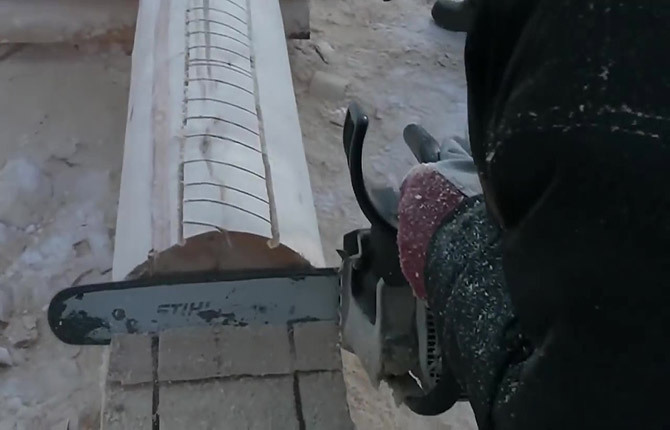
Next you need to remove the wood from the sides of the tenon.
All that remains is to level and fit the cheeks to the finish so that the log blank fits into the frame without cracks.

Results
At first glance, it may seem that it is impossible to build a log house in a bowl with your own hands. But this is only the first impression; if you master the use of a chainsaw and learn how to apply markings correctly, then it is quite possible to make a small log house for a bathhouse or a summer house yourself.
Tell us about your experience building a log house in a bowl. What should beginners pay attention to when first trying to work independently? Also save the article to bookmarks and share it on social networks.


