In many cases, instead of a classic rafter system, the roof slope has to be made in the form of a continuous slab. This can be a cast or prefabricated roof screed; in any case, quite complex and labor-intensive preparation of the base of the future roof will be required. But this method of forming roof slopes has many hidden advantages, for example, durability, strength, fire safety and water resistance.
The content of the article:
-
Prefabricated roof screed from DSP on the roof
- GVL screed
- ACL screed
- Flat slate screed
-
Roof screed with cement-sand concrete mortar for soft roofing
- Screed on finished ceiling
- Semi-dry screed on the roof
-
Slope-forming layer
- Formation of a slope using thermal insulation wedge slabs
- Roof slope of complex configuration
- Results
Prefabricated roof screed from DSP on the roof
The construction of a flat roof may seem much simpler than rafter structures. But this is not entirely true; making a reliable, flat and at the same time rigid base for a soft roof is quite difficult. The surface must be hard so as not to tear the roofing sheet.
The base of a flat roof can be made in three ways:
- Fill the monolith with concrete mortar reinforced with wire or rod. This method is used only for relatively small roofs.
- Concrete using semi-dry screed technology. A simpler method, available for construction by a team of two or three people.
- Assemble from sheets with high rigidity, resistance to moisture and heat when fusing a soft roof.
The latter option can be used on any flat roofs. The recommended material is cement bonded particle board. Adding fine chips to the CBPB structure makes the slab more elastic and reduces the risk of cracks.
All that is required when forming a prefabricated screed from DSP is to clean the surface of the slabs of the upper floor, seal the joints with mastic and lay out the thermal insulation correctly. The main requirement for installation is that the sheets must rest on insulation or concrete in at least three points. In addition, a drain slope must be formed.
It is known from practice that assembling the base of a flat roof from DSP is the fastest, most inexpensive and easiest to install.
GVL screed
The use of mineral fiber sheets for roofing is an exception to the rule rather than a common practice. It is not difficult to assemble a gypsum fiber board screed. The scope of preparation is the same: level the supporting surface or wooden sheathing on which the gypsum fiber board sheets will be laid.
The gypsum mass, even reinforced with fiber filler, more or less holds the load only in a direction parallel to the surface plane. Therefore, the base under the gypsum plasterboard must be carefully strengthened, strengthened, and leveled. If the gypsum fiber sheets hang in the air at least in one place, the roof will be torn off at the first heavy snowfall.
As in the case of CBPB, the GVL base is formed in two layers with the obligatory spacing of the seams. If GVL is laid directly on insulation, for example on EPS, then the bottom layer of the screed is glued to the thermal insulation.
ACL screed
For roofing, pressed sheets of asbestos-cement mixture made in accordance with GOST 18124-2012 can be used. Unlike slate, a large amount of quartz sand, ground to a dust state, is added to the ACL composition. As a result, the sheet acquires greater density, high rigidity, and the ability to maintain a flat shape under load.
ACL slabs are often used for cladding facades; therefore, during the production process, one or both surfaces are impregnated with a water-repellent composition. Sometimes a decorative layer of colored stone chips is painted and glued on. To assemble the base of a flat roof, ordinary unpainted sheets 8 mm thick with water-repellent impregnation are traditionally used.
Most often, the ACL screed is made glued, without the possibility of disassembly. The material is quite brittle and prone to cracking. If the ACL is mounted on a facade or fence, then drilling and fastening to poles using self-tapping screws or screws is allowed. In a horizontal position, the sheet is in an extremely unfavorable position in terms of load, so the material must rest on the insulation with its entire surface.
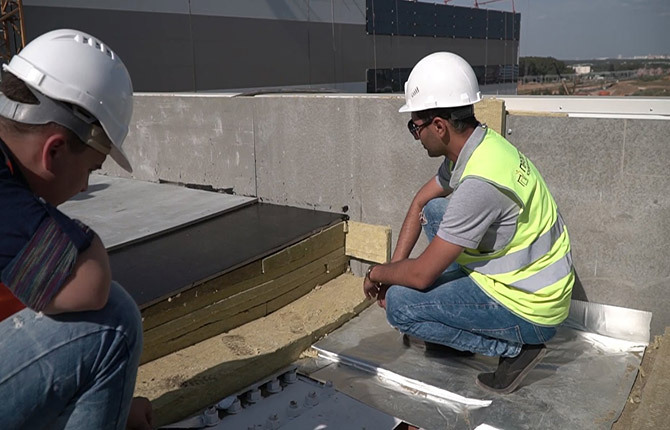
Particular attention is paid to the rough foundation. This can be a ready-made ceiling made of slabs or a plank lining (second layer) of the ceiling. To form a screed based on ACL, it is very important that the base is sufficiently rigid, therefore asbestos-cement sheets are recommended for use on concrete floor slabs.
The base must be prepared: cleaned, all cracks sealed with mastic. If a parapet strip is already assembled on a flat roof, then additional installation under the screed is not required. It is enough to stick two layers of EPS, secure the thermal insulation with mushrooms to the slab and you can lay a screed made of two layers of ACL.
The first layer of asbestos-cement sheets is laid out in rows on bustilate; a compensation gap of 6-8 mm should remain at the joints. It will need to be sealed with tape waterproofing (sealant).
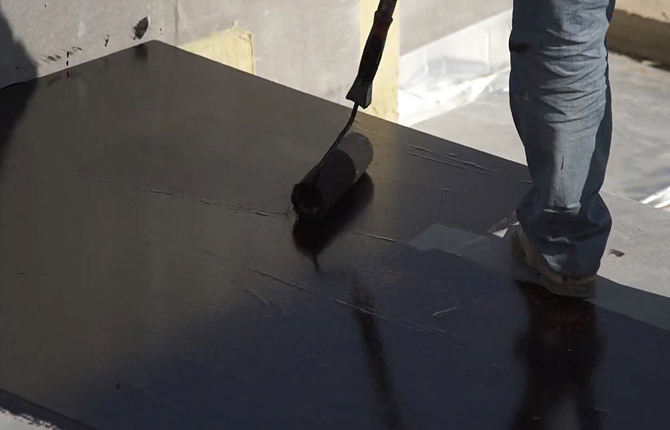
Often, to strengthen the roof, the bottom layer of ACL is covered with waterproofing mastic. The sheets in the prefabricated screed appear to be separated by a layer of soft mastic. The second layer of ACL is laid overlapping the seams of the bottom row of sheets.
After the top layer of the prefabricated screed has been laid out, wooden inserts are placed in the seams at the joints. They are needed to temporarily fix the top layer of the screed from accidental movement.
The last stage of arranging the prefabricated screed is to fasten the sheets of the upper and lower layers using self-tapping screws. There must be at least 12 attachment points for every square meter. It is clear that the screws must be driven into the material so that the head of the fastener is completely recessed into the ACL, otherwise the fastener will raise the waterproofing of the roof. After this, the retaining inserts must be removed from the joints.
All that remains is to stick a fiberglass reinforcing tape around the perimeter of the parapet and treat it with mastic. Only after this can the protective coating of the roof be applied.
Flat slate screed
According to its characteristics, a flat slate sheet is in many ways similar to ACL; it is made by wet pressing from asbestos fiber and high-quality cement. Flat slate is produced in fairly large sheets of 2-3 m, 12-15 mm thick. In this case, the material, due to the high content of chrysotile fiber, turns out to be quite flexible and elastic.
Therefore, in most cases, customers choose flat slate rather than ACL for prefabricated screeds.
The slate base is made according to the same rules as in the case of ACL. The roofing underlay is formed from at least two layers; in addition, an intermediate layer of mastic-based waterproofing must be made inside between the sheets. With the layer you can even walk on the screed without fear, without the risk of splitting the base of the future roof.
The only disadvantage of this material - this is a large amount of dust on its surface. After laying the prefabricated screed, before surfacing the glass roofing material, the surface must be dust-free.
There is another option for laying flat slate.
For rooms with a large roof surface, the consumption of EPS under the screed is too large. Therefore, to reduce costs, extruded polystyrene foam can be used in limited quantities or not at all.
For example, in garages and utility rooms, workshops, and warehouses with a flat roof, screeds with backfill thermal insulation are mainly used. Since flat slate is an elastic material, it can be laid directly on a layer of expanded clay, slag or foam glass granules.
A small amount (2-3 cm thick) of concrete mortar is laid on top of the expanded clay insulation. In this case, the first layer of flat slate is glued onto the expanded clay. The sheet must be laid on the insulation without waiting for the solution to set completely.
The concrete solution is made quite thick and viscous. This is necessary for three reasons:
- to seal expanded clay from possible leaks and condensation;
- to form a strong, rigid base under flat slate.
- in order to fix the drain slope.
When using bulk thermal insulation, the costs of arranging the screed are significantly reduced. You can control the slope visually by the level of inclination of the laid sheets of flat slate. For large slopes, you still have to check the slope with a level.
Roof screed with cement-sand concrete mortar for soft roofing
This method can be used both for buildings with already laid ceiling slabs and without them. If the frame of the house or garage already has a floor, then all that is required is to lay reinforced screed for insulation and slope.
The situation is much more complicated when the walls have already been built in the garage or in the house, but there is no ceiling as such.
Screed on finished ceiling
The screed formation pattern is in many ways similar to pouring a concrete floor, but there are some differences:
- When pouring a concrete screed under a flat roof, you need to accurately maintain the size, shape and direction of the drain slopes. Therefore, the screed for a built-up roof is usually poured in sections of several sections.
- Limitation on the thickness and weight of the screed. There are weight limits for roofing. In addition, it is impossible to make a flat base of large thickness due to possible cracking of the screed.
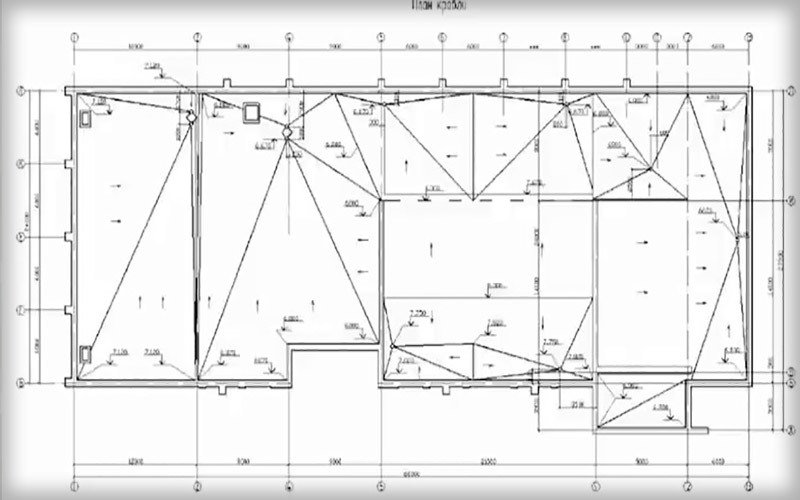
Even with reinforcement, the roof screed remains quite susceptible to temperature fluctuations. Because of this, the flat surface has to be divided into zones according to the degree of heating. For large flat roofs with the industrial method of roof construction, the surface is pre-divided into sections. A project is being carried out during which several sections with different geometries, slope lengths and slope values are formed.
In the case of small roofs with an area of 10-30 m2, for example, for extensions to a house, sheds, garages, auxiliary structures, the screed can be made as a monolithic slab with one direction of drainage. A prerequisite for a monolithic concrete screed is one temperature regime. That is, there should be no screening canopies or overhangs over a flat concrete roof.
Forming the base for screed and flat roofing
Before pouring concrete, you need to form a base on which the screed will be laid. If a building is being built using a semi-industrial method, then most likely the ceilings (and this is the base) will be formed from concrete ceiling slabs.
But in private construction, the use of even lightweight hollow core slabs is sometimes too expensive or becomes impossible for technological reasons, for example, if the walls of the house are made of blocks foam concrete. We have to look for a way to form a base for pouring the screed with the subsequent formation of a flat roof.
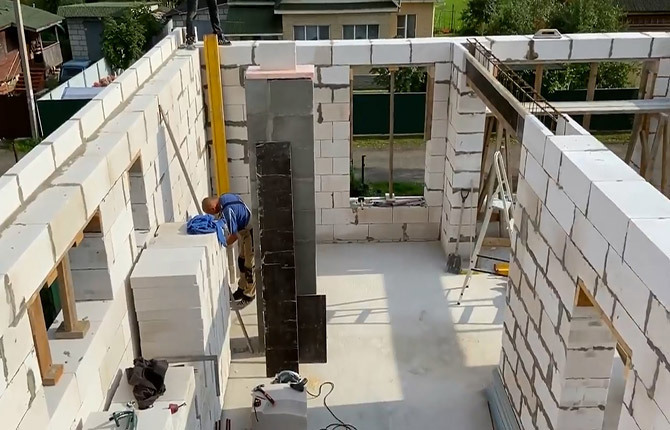
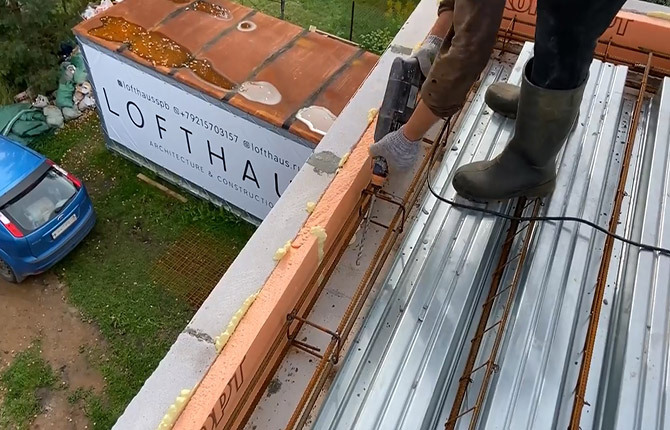
In this case, the base can be made of corrugated sheets, without beams or reinforcement with I-beams. The sheets are laid on the walls in six-meter sections, connected to each other with bolts, and the joints are carefully sealed with silicone. The result should be a “field” that completely covers the ceiling plane of the building.
To prevent the concrete from pushing through the corrugated sheets when pouring the screed, additional supports must be installed from the inside to support the metal ceiling through plank spacers.
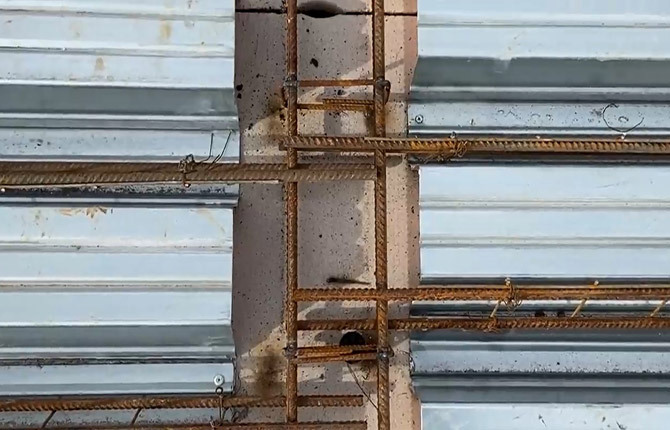
A board made of foam concrete blocks is laid along the perimeter of the roof. The side must be reinforced with EPS and reinforced with a tetrahedral frame made of 8 mm rod, otherwise, after pouring the screed, the concrete mass may squeeze out the blocks.
You can, of course, make a classic ceiling: lay floor beams, hem them, insulate them, and make a screed along them. But such a scheme for a flat roof is not very convenient, plus it will cost more. Wooden beams are clearly not suitable for screeding, and laying a channel or I-beam only makes sense if there is an open terrace area for relaxation on the roof.
Screed reinforcement
If the construction project provides for a flat roof, then the screed must be reinforced with reinforcement. For a conventional flat roof, the main reinforcement is performed with rods and mesh made of 6 mm steel wire.
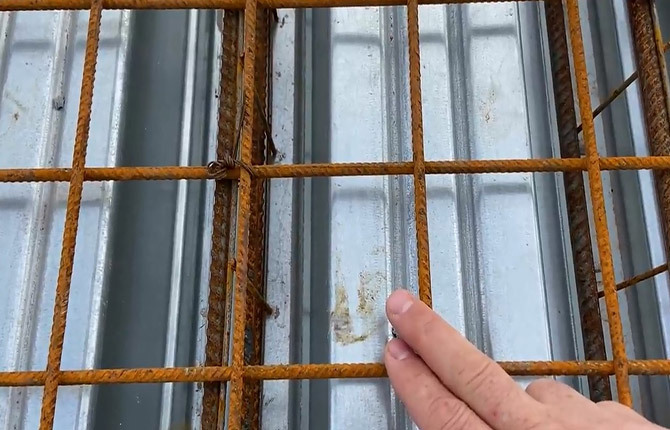
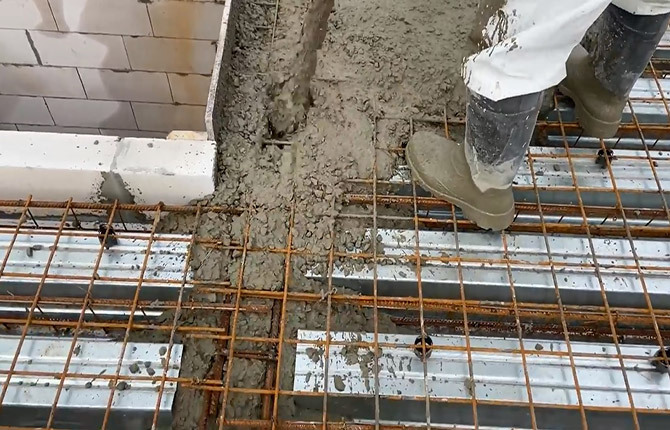
It will be necessary to reinforce the waves (depressions) of the corrugated sheet with rods. This is the weakest point of the roof. After installing the reinforcement cage and pouring concrete, full-fledged concrete beams will be formed inside the depressions of the corrugated sheet. They will take on the main load from the pressure of snow on the roof.
The main plane of the future roof is reinforced with a steel mesh made of 4-6 mm wire. It is laid in entire sections on plastic stands 30-40 mm high.

On buildings where the ceiling is formed from concrete floor slabs, screed reinforcement is performed with 6 mm fiberglass reinforcement or 6-8 mm rod. Cell size - 20x20 cm. The reinforcement is laid on top of the laid waterproofing to avoid leakage of the liquid concrete mass into the thickness of the EPS slabs. The reinforcing mesh is made immediately over the entire roof area.
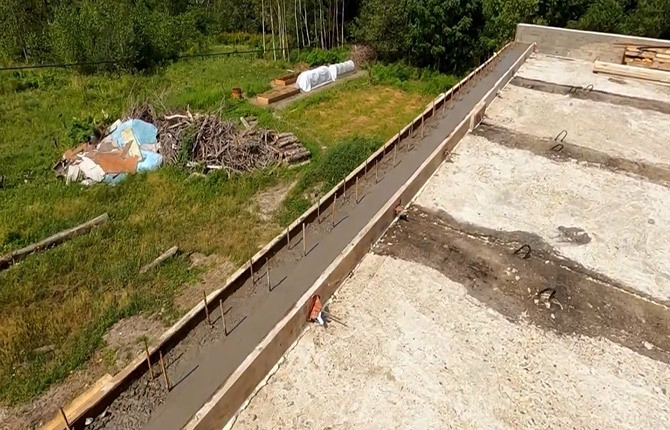
If the screed is made on top of the floor slabs, the foundation under the flat roof is poured in separate sections. At the boundaries between the pouring zones, polystyrene foam tape is laid or formwork boards are placed. An expansion joint remains between the filled areas, which will need to be caulked with an expanding cord before the soft roof covering is applied.
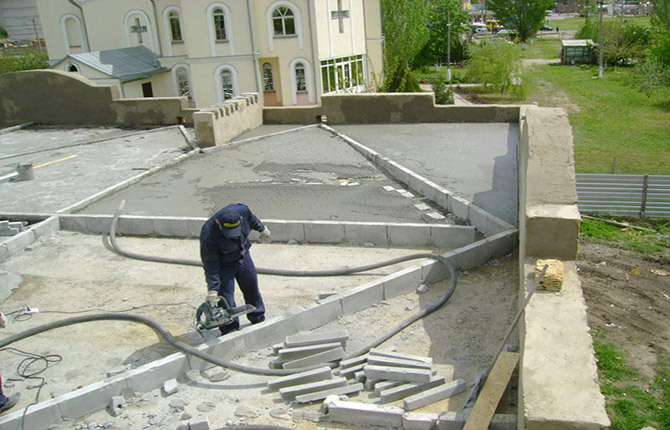
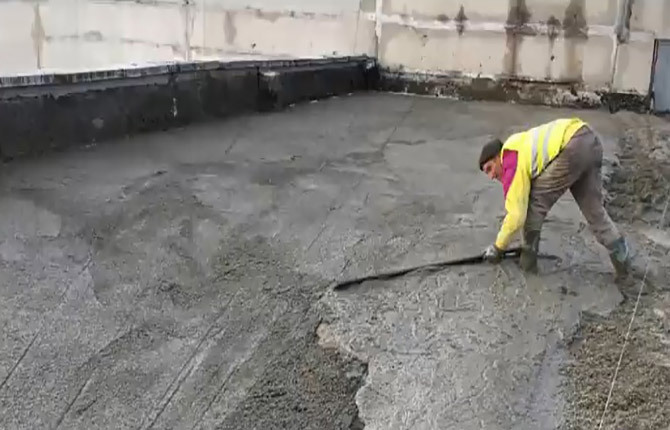
Filling the screed
There are two ways to form a flat roof slope. The first option involves the use of a concrete pump with a remote manipulator. The advantage of this method is the rapid supply of concrete and, as a result, high quality screed with minimal internal stresses inside the slab.
Pump filling is used for large roof areas. A minimum of 3 cubes of concrete can be placed in a car concrete mixer. With a screed thickness of 6-7 cm, one cube is enough for 15-20 m2. That is, renting a concrete pump at current prices only makes sense for roof screeds with an area of at least 50-60 m2.
During the process of pouring the screed, the concrete mixture must be leveled using wooden mops and trowels, otherwise voids may remain in the concrete, and in the future the surface may sag. As a rule, hidden defects in concrete cause violations of the geometry of drainage slopes. Saggy areas appear on the roof in which rain and melt water will collect.
How long does it take for a roof screed to dry?
Simultaneously with the pouring of concrete, the process of water loss begins. Most often, liquid leaks through the joints onto the first floor of the building. Because of this, the concrete mass self-compacts and the drying time is sharply reduced.
If additional measures are not taken, the screed on the roof will dry in three days, but cracks will appear on the base under the fused roof. In addition, the concrete will not gain the required strength due to the remaining dry cement grain.
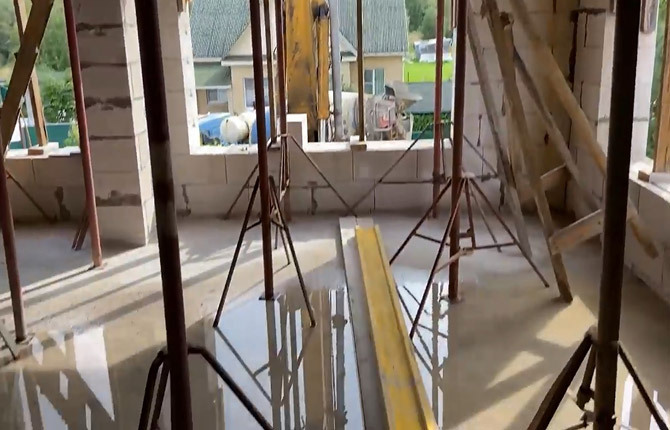
Therefore, the surface of the screed is covered with a film to reduce water loss through evaporation and periodically sprayed with a sprayer.
In such conditions, the screed will dry in 8-10 days to a state of 80% shrinkage. Now you can insulate drainage slopes and fuse thermal insulation.
Semi-dry screed on the roof
This method is used mainly on buildings with ceilings made of hollow-core concrete floor slabs. Dry screed, even when using high grade cement, is not strong enough, so a rigid base is required for it.
A big advantage of the cement-sand semi-dry screed technology is the absence of strict time frames for pouring. When pouring a monolithic slab, the concrete solution must be placed into the base of the roof within 3-4 hours. If we take into account the time for transportation, it is clear that the time is limited, which means that the filling must be done by a team, otherwise it simply won’t be done in time.
In the case of a semi-dry screed, one person can work on the roof, prepare the mixture “on the ground”, lift it and lay it in the base of the roof as far as possible. Therefore, this scheme is used mainly for roof repairs or for self-filling flat roofs of small buildings.
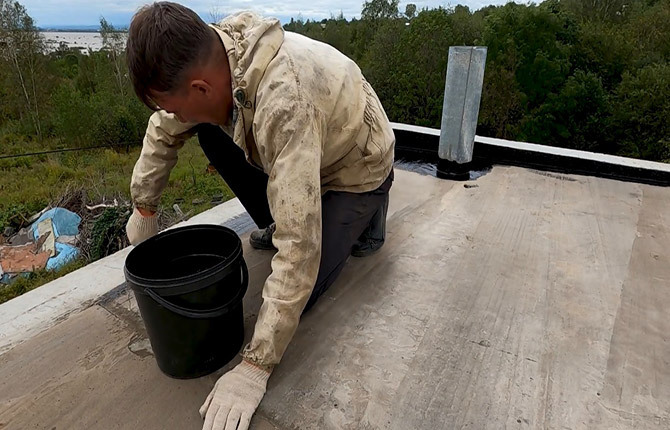
Preparation
The first step is to clean the surface of the floor slabs, remove the remains of exfoliated concrete, crumbs, sand dust, and debris from the old roof. The joints between the plates are cleaned, blown and coated with mastic. If the quality of the concrete is low, then before sealing the gaps you need to treat them with a primer or at least white spirit with resin diluted in it.
To form a screed using semi-dry mixture technology, it is recommended to build a side around the perimeter of the walls. This will make it possible to use bulk insulation, such as expanded clay, slag or granulated foam glass. The material is light and cheap, it is easier to increase the thickness of the thermal insulation than to buy and install more expensive EPS.
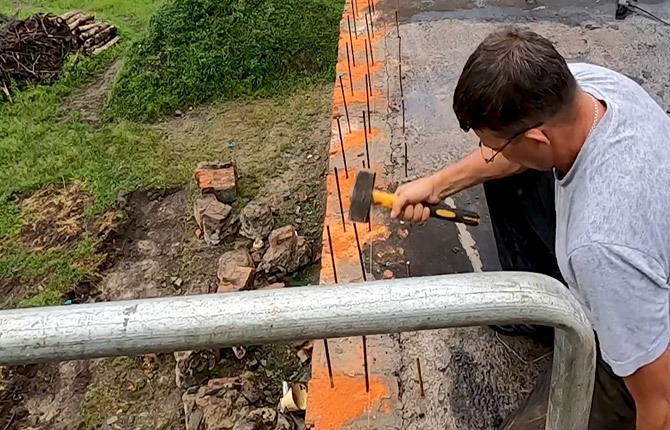
To tie the board to the base of the roof, short pieces of reinforcement are hammered into the walls; the frame of the future roof fence will be attached to them.
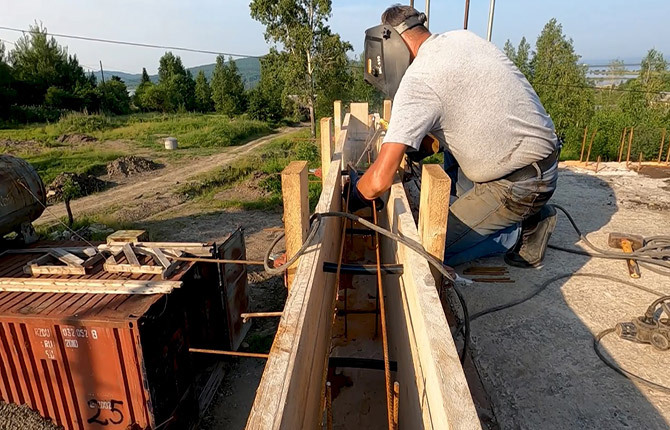
Next, the horizontal rods of the reinforcing frame are tied to the rods, and the individual sections are welded into one strip. In addition, you need to install formwork for pouring concrete; it is made from slabs or waste construction boards.
Laying insulation
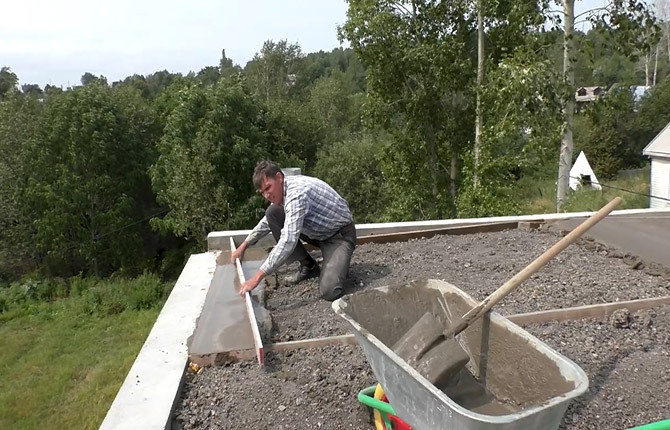
The thickness of the thermal insulation of a roof made of expanded clay or slag will be quite large, from 15 to 25 cm. A flat roof does not have internal drains for rainwater, which means that before laying a semi-dry screed, drainage slopes must be formed. Usually, according to GOST, for a flat roof a slope of 1.5-2% is sufficient, but since the length of the slope is short, the angle can be increased to 4-5%.
This will not affect the strength and geometry of the top concrete layer. The cement-sand mixture is too viscous and hardens quickly enough, there will be no folds or sagging.
Beacons are used to control the roof slope. These are two boards knocked together and secured to a support made from a piece of timber. One pair of boards can be attached directly to the side of the roof gable. The remaining beacons will need to be laid out as the roof insulation is filled in.
Formation of semi-dry screed
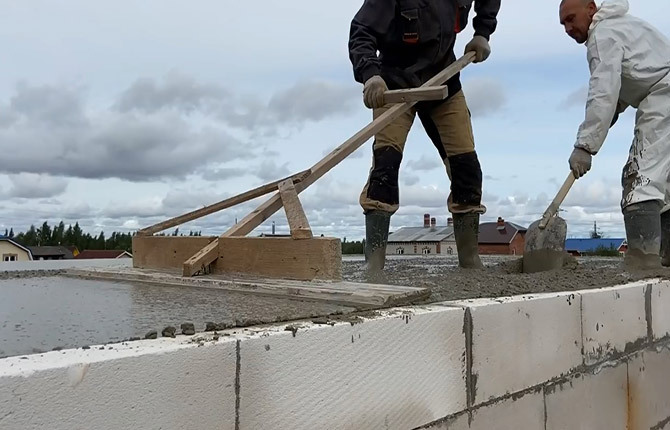
As soon as the first meter and a half of thermal insulation has been laid, you can begin to form a semi-dry roof screed. First you will need to mix the concrete solution and lift it onto the wall.
A lot of material will be required, for each square meter at least 40 liters of solution. The consistency is approximately the same as when laying bricks. If the screed on the roof has to be done in the summer in the heat, then it can be made more fluid, approximately at the level of liquid sour cream.
Important!It is necessary to take into account the absorption capacity of the roof insulation. If EPS is used, the solution is made plastic and thick; for expanded clay or slag, more water is added. A significant part of the moisture will be absorbed by the insulation and evaporate. Cement - grade 300-400, no more.
Another condition is that you need to add chopped fiber to the concrete mass, preferably chrysotile or polypropylene scree. Plus additives to improve the plasticity of the concrete mixture.
The concrete mass laid on the thermal insulation of the roof is distributed along the sector, sprayed with water and stretched, as a rule, along wooden beacons. Water will have to be added constantly, otherwise leveling the screed will be difficult and physically difficult.
Finishing operations
After 5-6 hours. After laying the screed, you will need to seal the joints left from dismantling the beacons. The drying time of the roof base depends on the air temperature and wind. If it is hot and windy, then the surface must be temporarily covered with film. While the concrete is gaining strength, you need to coat all the cracks in the junction area with bitumen.
After another 6-7 days, the screed is coated with bitumen primer, it is better to use TechnoNIKOL, but ordinary kerosene with bitumen can also be used.
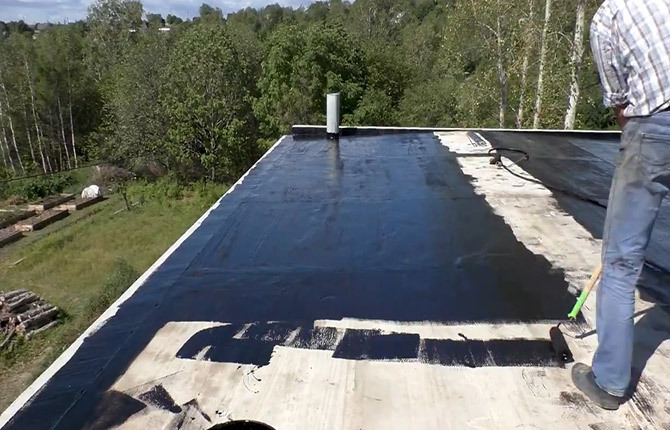
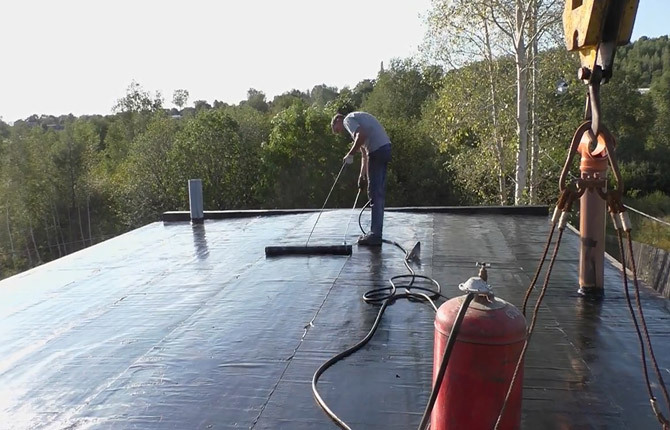
Next, a soft roof is fused. The time between applying the primer and surfacing should not be more than 5 hours. For a flat roof without a parapet, it is better to use glass roofing material with fine-grained mica powder. No one will walk on the roof, and water drains better on a smooth roof.
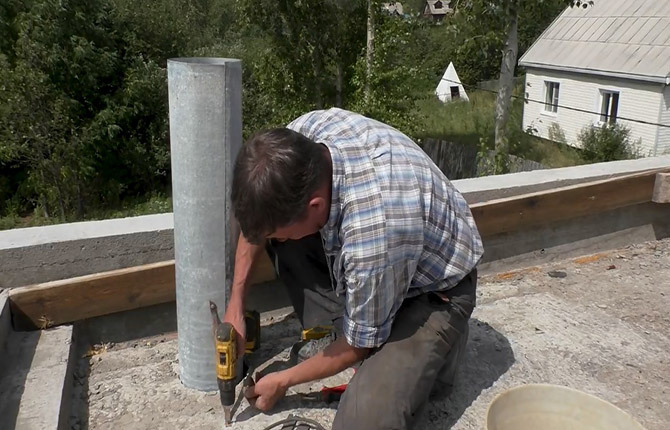
The final stage is the installation of a thin-sheet galvanized canopy around the perimeter of the roof.
The corner must have a drip at the end so that the wind does not blow moisture onto the walls of the building.
Slope-forming layer
A properly formed slope ensures normal water drainage even if there is snow or ice on the roof. According to SP 17.13330.2017, a flat roof must have a slope for normal moisture drainage; there are recommendations for an angle of 1.5%. There is no clear indication of the minimum slope value. The main thing is that the flat roof is safe (strong and rigid), not slippery, and the slope of the screed ensures the drainage of moisture no matter how strong the wind.
There are three main ways to form a slope:
- laying out thermal insulation in a cascade of wedge-shaped slabs of different thicknesses;
- leveling the slope when laying semi-dry screed;
- local pouring of concrete mixture onto an already formed screed.
In the latter case, you have to add small portions of foam concrete or expanded clay concrete.
They have less fluidity and it is possible to make the best option for the drain surface. It is used for slope formation only for small areas of flat roofing, for example, for forming rain funnels on the roofs of high-rise buildings.
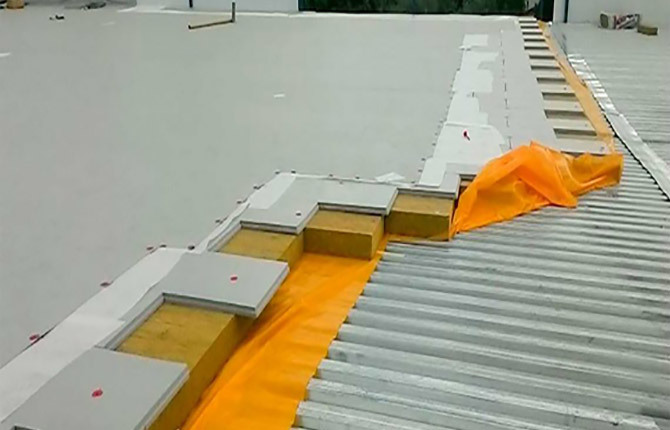
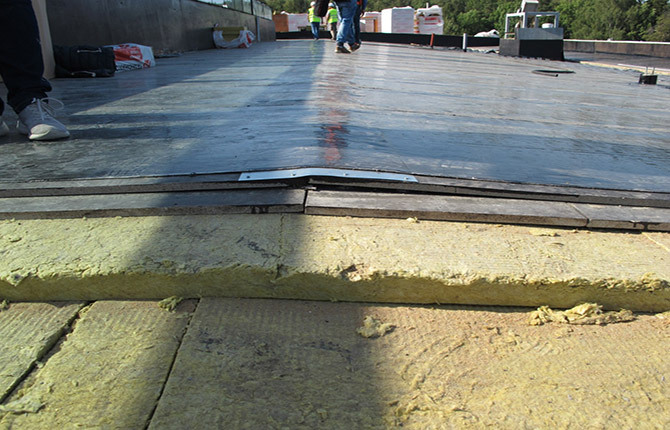
Formation of a slope using thermal insulation wedge slabs
For prefabricated and cast (semi-dry) screeds, the plane of the roof slope can be formed using thermal insulating materials (TIM). For this, wedge-shaped plates of different thicknesses are usually used. Wedges, as a rule, are selected in pairs so that the roof surface is monotonously flat, without dips or humps.
The scheme with wedge-shaped TIMs can be used on any screed; sometimes this is the only possible way to form a roof slope with proper water drainage.
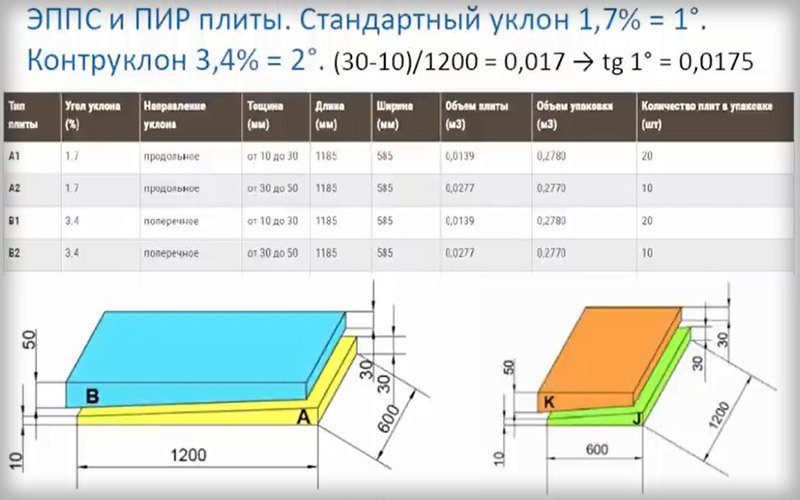
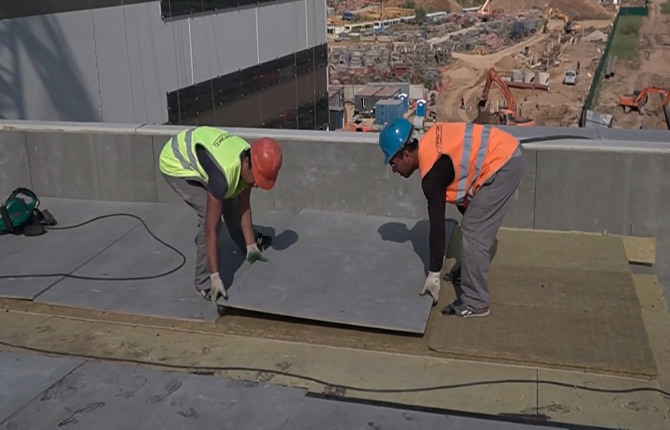
If the roof screed is carried out as a prefabricated roof, then builders often adjust the thickness and number of roof insulation sheets directly on site.
Roof slope of complex configuration
The easiest way to form a roof slope is with a semi-dry screed. The only requirement is to correctly mount and position the beacons (usually metal) in order to the slope led to the drain, the water flow moved only downwards, without lateral flow of moisture onto the adjacent plots.
In this case, the slope is formed according to the angle of inclination of the beacons. Most often, the inclination angle is much greater than the recommended 1.5% (1O), but it is simply impossible to make it smaller due to the technological features of the formation of the slope.
Results
Screeding a flat roof looks simpler than with rafter systems. It is not difficult to do, but you need to take into account the peculiarities of the formation of slopes. Each roof requires a preliminary calculation and mandatory subsequent testing of the functioning of the drainage of melt and rainwater.
Tell us about your experience with pouring base for flat roofs. How difficult is it to do a roof for someone without relevant work experience? Also share the article on your social networks and bookmark it.