Floors on the ground are laid directly on the soil, which is carefully tamped, and then a layered cake is formed. This simple technology can be implemented only if the groundwater in the area is low (they look like a maximum of 4 m to the surface). Schemes of such a floor, as well as step-by-step installation instructions, can be found in the material presented.
The content of the article
- Schemes and advantages of the floor on the ground
-
Step by step installation instructions
- Foundation preparation
- Arrangement of the subfloor
- Waterproofing
- Warming
- Reinforcement
- fill
Schemes and advantages of the floor on the ground
The floor on the ground is the simplest design option, which is usually cheaper than the others. It has several advantages:
- ease of installation - the screed can be completed in just a day;
- good heat and waterproofing (in case of using high-quality concrete);
- durability, wear resistance;
- affordable price.
However, these advantages can only be achieved if you know the floor structure on the ground and certain requirements:
- dry, dense and immobile soil;
- groundwater is suitable for a height of no more than 4 m;
- mandatory waterproofing and insulation.
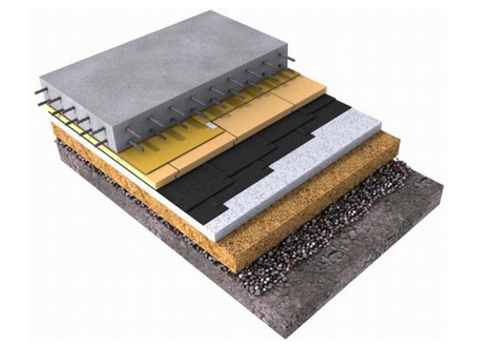
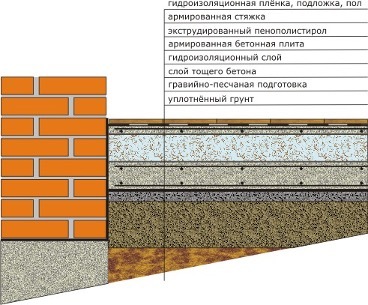
It is also necessary to imagine the “pie” - what the floor construction on the ground consists of:
- a layer of compacted sand;
- crushed stone or gravel;
- waterproofing;
- concrete screed;
- steam and thermal insulation;
- clean floor, finishing.
Before starting work, you will also need to calculate the floor on the ground. You can lay it in any house that meets the requirements described above. At the same time, they are guided by a thickness in the range of 35-50 cm. If, due to thermal insulation or the close occurrence of groundwater, it is necessary to make a thick embankment of 60 cm or more, the work will be too expensive. In such cases, it is advisable to simply lay a monolithic concrete slab - it will cost less.
It is also recommended to clarify the design scheme. If the composition of the floor on the ground is approximately the same, then the schemes may be different:
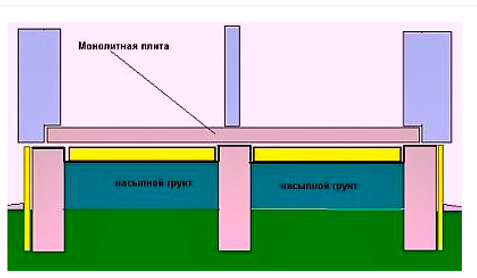
- with support on the ground;
- supported by walls.
In the first case, the screed is placed directly on the ground or on pre-installed wooden logs. This is the simplest and therefore inexpensive type of construction, providing normal thermal insulation even in harsh winters.
But if too high backfill is required (60-100 cm), such a floor scheme on the ground will be too expensive. Therefore, it is better to choose the second option based on the walls. Thanks to this, an air gap is created from below, and the resulting space can be used as a cellar. But such a design is more complicated, and the calculation of floors on the ground shows rather high costs.
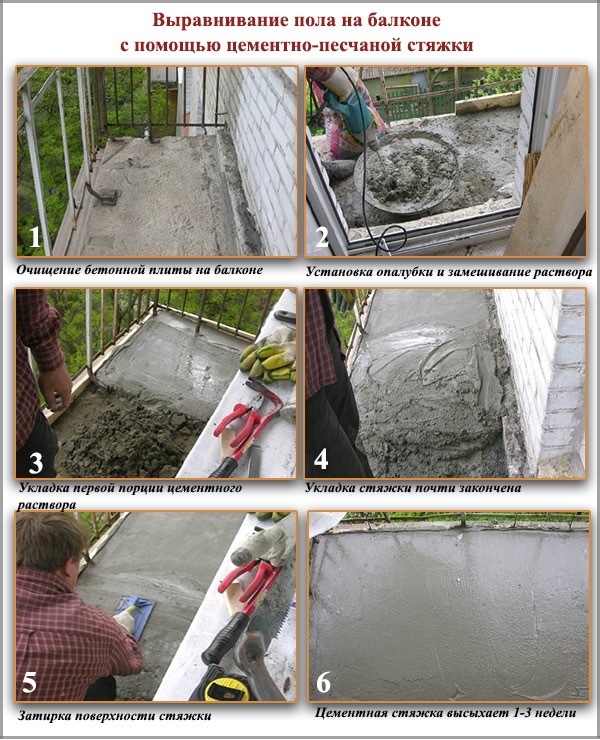
Step by step installation instructions
Earthen floors are mounted in several stages - first, the base is prepared, the rough surface is finished, after which they create hydro and thermal insulation, and then they are reinforced and poured with concrete.
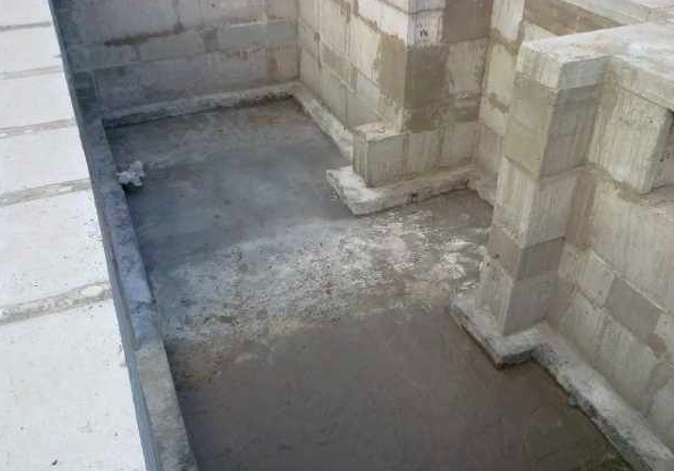
Foundation preparation
The technology of floors on the ground at the first stage provides for the preparation of the base. The procedure is as follows:
- Using a level, determine the zero point.
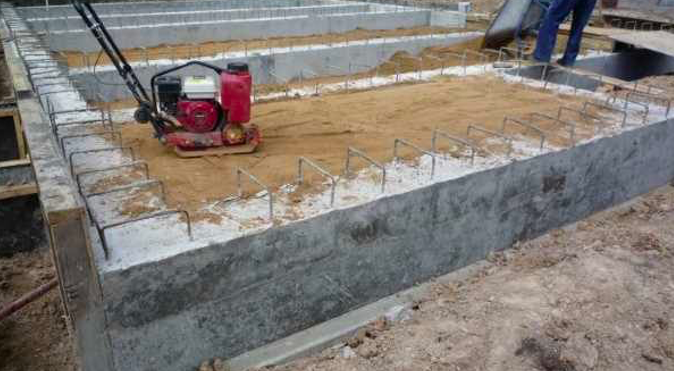
- The soil surface is carefully tamped - for this, a vibrating rammer is used.
- Sand is poured first a quarter higher than the calculated height.
- The layer is moistened and rammed - you can use both a vibratory rammer and a small skating rink.
- The next layer of the floor on the ground is gravel or expanded clay.
Arrangement of the subfloor
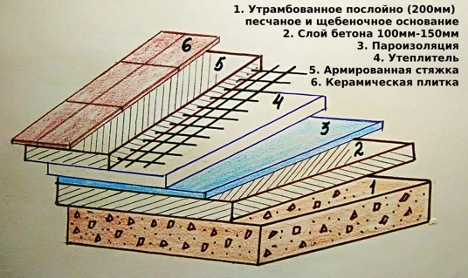
During construction, the thickness of the floor layers on the ground is observed. So, the compacted sand base should be approximately 200 mm, and the concrete layer should be 100-150 mm, as shown in the diagram.
In this case, concrete is also used for the first layer of the subfloor. It is needed in order to level the surface for the purpose of subsequent laying of a waterproofing layer. The calculation of the floor slab on the ground shows that for this purpose it is better to use lean concrete B 7.5-10 with crushed stone of a fraction from 5 to 20 mm. Filling is performed so that the result is a layer of 40-50 mm.
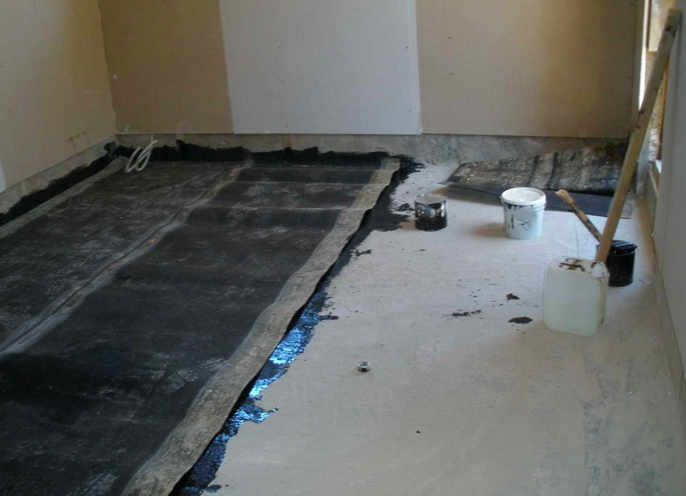
Waterproofing
Next, you need to carry out waterproofing. To do this, it is not necessary to draw up a drawing of the floor on the ground - an approximate drawing will do. As a waterproofing material use:
- bitumen in a roll or a polymer membrane - it is overlapped by at least 10 cm and fixed with construction tape;
- the insulating sheet is also overlapped and brought to the walls by at least 15 cm, after which the excess parts are cut off;
- if it is difficult to perform waterproofing, it is allowed to pour a concrete base, and then apply bitumen or polymer on it.
Warming
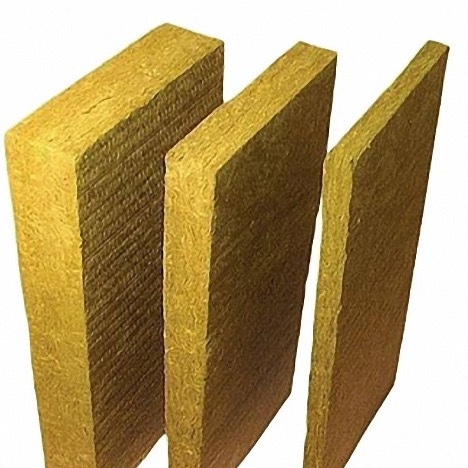
Concrete is poured in such a way as to take into account the calculation of the floors on the ground according to the bearing capacity. Since the surface will experience static and dynamic loads, it is necessary to choose a durable insulation, for example:
- extruded polystyrene foam - withstands great pressure, does not rot, is affordable;
- polystyrene of classes PSB 35 (for residential premises) or 50 (for household premises - a bathhouse, garage, barn, etc.);
- mineral wool is also quite strong and protects well from the cold, but it can suffer from moisture, so it needs a tight vapor barrier.
Floor constructions on the ground provide for the installation of insulation strictly on the vapor barrier. As it is usually used a dense PVC membrane. It is also overlapped and glued with tape. You can also use a bituminous membrane with fiberglass or polyester - it is more affordable, and its strength is not inferior to PVC.
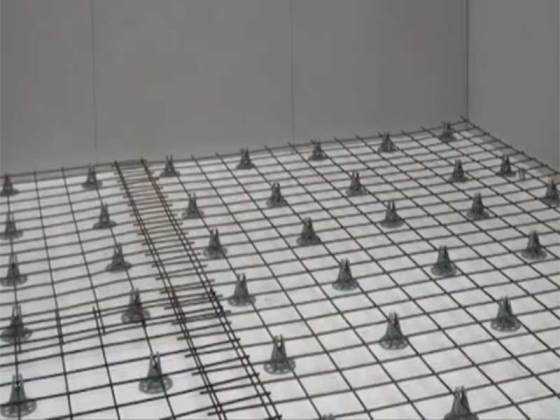
Reinforcement
The floor of the first floor on the ground must be reinforced with a mesh of rods, the diameter of which is 3-5 mm. Since this is not a classic foundation, one layer is enough, and you need to lay the grid taking into account the following rules:
- it is better to mount as close as possible to the concrete surface;
- the optimal layer thickness is 15-20 mm, so it is better to lift the mesh and place it on concrete or polymer pads.
- the perimeter of the structure is protected with exactly the same layer, for example, with cards with square cells 10 * 10 cm.
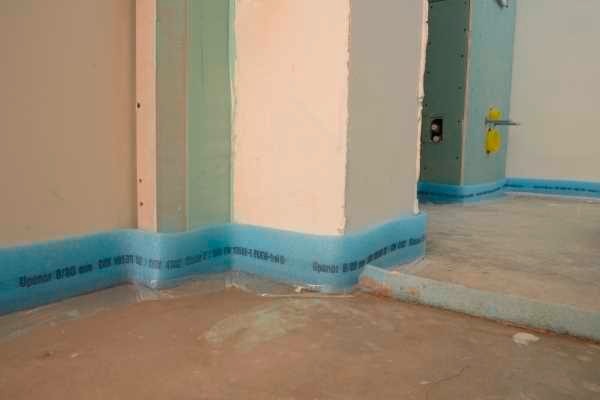
fill
We can say about the field on the ground that it is a multilayer structure (pie), which ends with a damper layer and filling. At one of the last stages, strips of polyethylene are cut out, placed on the ribs around the perimeter, or a special damper tape is glued at the bottom of the walls, as shown in the photo.
The base under the floors on the ground must be carefully leveled using beacons for plaster, which are placed in the thickness of the gypsum solution. You can also use the starting putty. Between the beacons lay the mixture and level it with the help of the rule. Next, the beacons are removed and the cavities are poured with concrete, after which the surface is leveled again.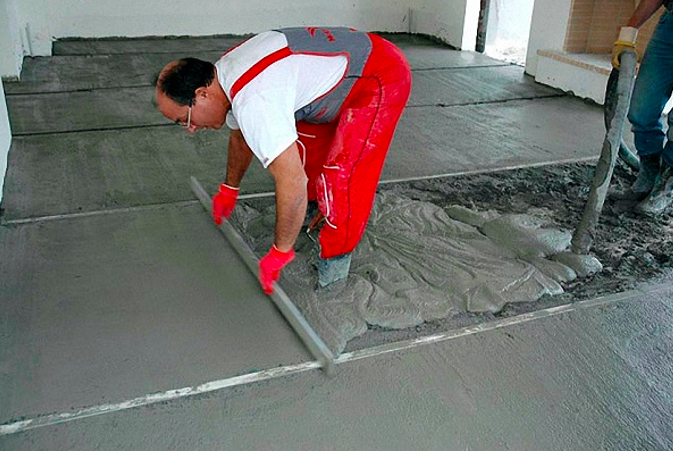
Thus, all work can be done independently, since special equipment is not required. At the same time, the quality of the rammer is of great importance - for this it is better to use a vibratory rammer and control the quality with a building level.